 Well dear readers, after 2 weeks I strained the apple cinnamon vodka and brought it to my sister's for a little cocktail party. We set it out with a pitcher of apple cider and let people spike their own drinks with it and it was quite a hit. The flavors blended so well that you couldn't even tell there was vodka in the cider even though you poured it in there yourself. I didn't get to try any of it in tea, but I think that would be quite delicious as well. All in all, vodka #1 was a success, and I just taste tested #2-4 and they are all quite good. I believe they could be drunk at any point now, but I am going to let them steep until I need them/save a few bottles to put them in (it is a bit to difficult to pour from quart size mason jars for my level of clumsiness).

Sunday, November 27, 2011
Infused Vodka Update
Well dear readers, after 2 weeks I strained the apple cinnamon vodka and brought it to my sister's for a little cocktail party. We set it out with a pitcher of apple cider and let people spike their own drinks with it and it was quite a hit. The flavors blended so well that you couldn't even tell there was vodka in the cider even though you poured it in there yourself. I didn't get to try any of it in tea, but I think that would be quite delicious as well. All in all, vodka #1 was a success, and I just taste tested #2-4 and they are all quite good. I believe they could be drunk at any point now, but I am going to let them steep until I need them/save a few bottles to put them in (it is a bit to difficult to pour from quart size mason jars for my level of clumsiness).
Sunday, November 13, 2011
Infused Vodka


To make the pomegranate vodka, start with a pomegranate (or two). If you already have a technique for getting the little seeds out then by all means use it, but if you don't I would suggest cutting the fruit in half and then submerging it in water to remove the seeds, otherwise you may end up staining you entire self and kitchen with little splatters of bright red juice. Then grab your mason jar, or other airtight container and add your pomegranate seeds. My rule of thumb (which I use very loosely and developed today, so after I see how these turn out I may change it) is this, I have quart jars, I used two cups of fruit, however much sugar struck my fancy and then filled it up with vodka, when I had less fruit I used less vodka. Anyways, toss in some sugar and then a bit of orange peel, put the lid on your jar and let it sit. Possibly for several weeks, I will let you know when I figure that bit out.


To make the cranberry vodka, take a bag of cranberries, toss them in a sauce pan, add a bit of water, a generous sprinkle of sugar and boil until the cranberries start to pop, which brings me to the second guideline I developed today, fruit with a tough skin should be helped along, either cut open or cooked, and fruit with a coating should be skinned. Remove from the heat and pour two cups of the cranberry/sugar water mixture into your jar and top it off with vodka. I would have added some orange peel to this but my mother isn't such a big fan of the orange-cranberry combination so I left it out, but feel free to add it if you wish. One bag of cranberries will probably give you a bit more fruit than you need, but my two pomegranates did as well, so I combined the extra in one jar and topped it off with vodka.


For the apple vodka, because I used a grocery store apple with that lovely waxy coating on it, I peeled it first, but I would imagine that if you had a farm fresh, uncoated apple you could leave the peel on without any problem. Then, because I have big plans to use this to spike some Good Earth tea, I poured honey in instead of using sugar, as the tea and honey combination is such a lovely one. Toss in half a cinnamon stick and a whole clove and top with vodka. I have a feeling this one will not take very long to infuse, considering that there is so much surface area of exposed apple flesh. For now all of my vodkas are sitting on my bar cart, which considering how cold my house always is, is a cool place, although not very dark. I imagine that due to my obsessive nature I will shake the jars every day to stir them up and see how it is going and will probably start tasting them in about a week to see how flavorful they are becoming. When they taste good I will strain them through cheesecloth and pour them back into their mason jars until I can be bothered to find/repurpose suitable bottles. I will let you know how they turn out.
Wednesday, October 19, 2011
Blowtorch Smores
I am dipping my toes back into the blogging world with two recent foodie discoveries I made. First of all, and this one may be a no brainer for you but it was a total aha moment for me, whack a granola bar on the counter a couple of times and you have an instant, already packaged single serving of granola to mix into your yogurt. I have found the TLC brand of granola bar to lend itself particularly well to being smacked into bits, in fact I feel they are too crumbly if you try to eat them while still in bar form. Anyways, my second discovery is much more exciting as it involves super easy year round smores. I just got a blowtorch two days ago for my birthday and of course I immediately started searching my cookbook collection for blowtorchable recipes. I already had a smores cupcake idea in the works after I tried one this summer (graham cracker crust topped with chocolate cupcake and then toasted marshmallow frosting, it was quite delicious) but I hadn't thought of making a smore itself with the torch, until tonight. And I must say it worked out quite well. I used a reese's cup from my Halloween candy stash for the chocolate and split the marshmallow in half so the middle would have more of a chance at melting the middle, which was somewhat effective. The marshmallow was not as melty as I would have liked, but I think flipping it over and toasting the bottom would have gotten it there, or spreading marshmallow fluff on the graham and then toasting that would have worked, I still need to test that theory. The reese's cup was a stroke of genius if I do say so myself, I really want to try other candies in my smores now, if I dip into the Halloween stash I can test out almond joys, kit kats, snickers, milky ways and crunch bars too (I'll let you know how it goes). All in all, in less than sixty seconds I ended up with a fair approximation of one of my favorite summertime treats and I got to play with a blowtorch, so win win.
Saturday, September 17, 2011
Italian Wedding Soup


Start by mixing up the meatballs, whatever type of ground meat you prefer, breadcrumbs, egg, parmesan, garlic (just use a microplane and grate it in, much simpler than mincing) and nutmeg (don't leave out the nutmeg, it's important). Keep in mind that you will be eating these with a spoon when you form the balls, keep them small.

Bake at 350 until lovely and brown.

Meanwhile, dice your celery, onion and carrot. I like to make these pretty small as I find large pieces of cooked carrot offensive, this way they all meld into the soup and flavor it but you hardly notice they are there. Saute them in a big pot until soft. Don't rush, this is your flavor base.

Once the veggies are done add the broth and water and bring to a boil, then reduce to a simmer. Toss in the meatballs and the pasta.

When the pasta is done, toss the spinach in, as soon as it wilts your soup is ready.
Italian Wedding Soup, slightly adapted from Framed Cooks
1 pound ground meat, your preference
1 egg, beaten
2 cloves of garlic, grated
1/3 cup parmesan, grated
1/3 cup breadcrumbs
1/2 teaspoon nutmeg
2 tablespoons olive oil
1 1/2 carrots, peeled and diced
2 sticks celery, diced
1 medium onion, diced
2 bay leaves
salt and pepper to taste
6 cups chicken broth
2 cups water
1 1/2 cup ditalini or other small pasta
1 pound baby spinach
Preheat the oven to 350.
Mix the ground meat, egg, garlic, parmesan, breadcrumbs and nutmeg together. Form into small, spoonable meatballs and place on a greased cookie sheet. Bake for about 20 minutes, until brown and cooked through.
Meanwhile, saute the carrots, celery and onion in the olive oil in a large pot until soft but not not brown.
Add the bay leaves, salt and pepper, broth and water, bring to a boil then reduce to a simmer. Carefully add the meatballs and pasta, simmer until the pasta is cooked, about 10 minutes.
Stir in the spinach, when it is all wilted, which will take a minute or two the soup is done.
Tuesday, August 23, 2011
Emma's Eats visits the Napa Valley
I had a wine soaked trip to the valley this summer. Thanks to my cousin now being a 21 year old Napa resident, we were able to take full advantage of the Napa Neighbors program and received several complimentary wine tastings. It was nice. There are approximately 73000 wineries in the Napa Valley (wikipedia says it's more like 300, but what do they know) so it can be hard to make a decision about where to go, unless you are some sort of wine aficionado and have your list already.

 I know ones taste in wine is much like ones taste in comedy in that people can have vastly different preferences, so these are just a couple of my favorite wineries and why I like them, which may or may not be helpful to you but it might give you a starting point for your own trip or let you live vicariously. Fair warning though, I am not a picky wine drinker, I like just about anything (although after a few tastings I can swirl and sniff like a pro, or at least a proficient amateur) so I tend to judge wineries on the overall experience and not entirely on the quality of wine.

Mondavi
I read a book called the House of Mondavi and I became slightly obsessed with Mondavi (I have a habit of developing generally brief, yet intense interests in various things, right now I am riding out an elephant phase, they are FASCINATING). Mondavi is an iconic winery, and by that I mean the Robert Mondavi Winery, not to be confused with Charles Krug or CK Mondavi or Opus One or Woodbridge by Mondavi all which have a Mondavi family relationship in one way or another (read the book if you want to know more, it is quite dramatic, especially if you skim over the more business/financially oriented sections). Robert was a key player in making the California wine scene what it is today and I think it seems fitting to visit his winery. And, while I don't believe the wine has the reputation it once did, it is still pretty good.
Artesa
 Artesa is an absolutely gorgeous winery, it is up on a hilltop, not tucked away on the valley floor like many, so you can see for miles. Miles and miles of grapes and rolling hills, it's lovely. You can do a tasting at the bar or buy a bottle of wine or a flute of sparkling wine and take it out onto the patio so you can enjoy the view. Artesa is one of those places where the setting outshines the wine for me, not that the wine is bad, but I would go for the view. I hear you can see to San Francisco on a clear day. Apparently it has never been clear enough when I have been there.
Cakebread Cellars
 Cakebread is one of the wineries that requires a reservation, but we stopped by after lunch on a Tuesday and there was no problem getting in for a tasting. They take each group to a different location on the property for their tasting, which is nice, we ended up on the patio, but they say you could end up in the fermentation room, the barrel room or next to the vines. Cakebread is one of the places where the wine outshone the setting, and I liked every wine that was poured. Also, my tasting happened to be led by a chef, who talked about what foods she would have paired with every wine, which was perfect for me.
Flora Springs

 I have had a long relationship with Flora Springs, the estate (which houses the winery, there is a tasting room on highway 29 that is not as cool) is literally right down the street from my grandmother's house. In fact, we used to ride our bikes through the Flora Springs vineyards, it may or may not have been considered trespassing, but my grandfather was the one who showed us the dirt roads that crisscrossed the property so I figure it was ok. Being neighbors we had a complimentary tour and tasting that sort of knocked our socks off. There were hardly any other people, so it felt like we were at our own private villa being wined and dined (and by dined I mean they brought out little dishes of aged gouda, almonds, cashews, crackers and chocolate). The wine and the setting were both quire nice and we ended up spending quite a lot of time there, quite a lot meaning multiple hours. It is another place where you need reservations, but I think if you are going to do just one tour, this should be it.
Mumm Napa
Mumm is my favorite sparkling wine place in the valley, the setting is gorgeous and you can get a flight of wine so you can taste it side by side which is a bit unusual. In the past we have gone and gotten a bottle or two for the table and each have a glass (or two, but no more as we learned they have a two flute max) instead of doing a tasting, but I am not sure if they do that anymore. According the Mumm tour guide, they have the smallest bubbles, smaller than say, Chandon, the other makers of sparkling wine I have visited there. Now I have never done a taste test, nor do I know how one would measure the average bubble size in a bottle of bubbly but I do know that Mumm has bubbles that are quite lovely and they do actually seem smaller than some of the, shall we say, less costly ones I have tasted.
And these are only a few of the dozens of possibilities, drive around, stop in where ever strikes your fancy, you may find a gem, it's all part of the fun.

all photos courtesy of Caitlin and Austin
FYI: I didn't spill my wine, I was testing out my new wine snob trick, rolling the glass to coat the sides and enhance the aroma.
I would suggest that you do a little investigative work first, most of the wineries are open from about 10-4, but some require appointments and others do not. Also, there is the tour question, personally I love a good tour but even I max out around 3 (I mean really, after awhile they aren't exactly covering new material are they? There is only so much about wine making that you can understand without a viticulture degree). Some places have three or four tours a day and others have a tour every hour, so check with the winery if you have your heart set on a tour. Ideally, I would go on a sparkling and a still tour, because who doesn't want to know how the bubbles get into the champagne (I know, I know, it's not actually champagne, but sparkling wine doesn't have the same ring). Tastings generally run about $15 and up, unless you can grab a local to bring along, or get a coupon, I found an app on my iPhone that had lots of 2 for 1 tasting coupons but I didn't actually end up using any of them so I have no idea how well they work. 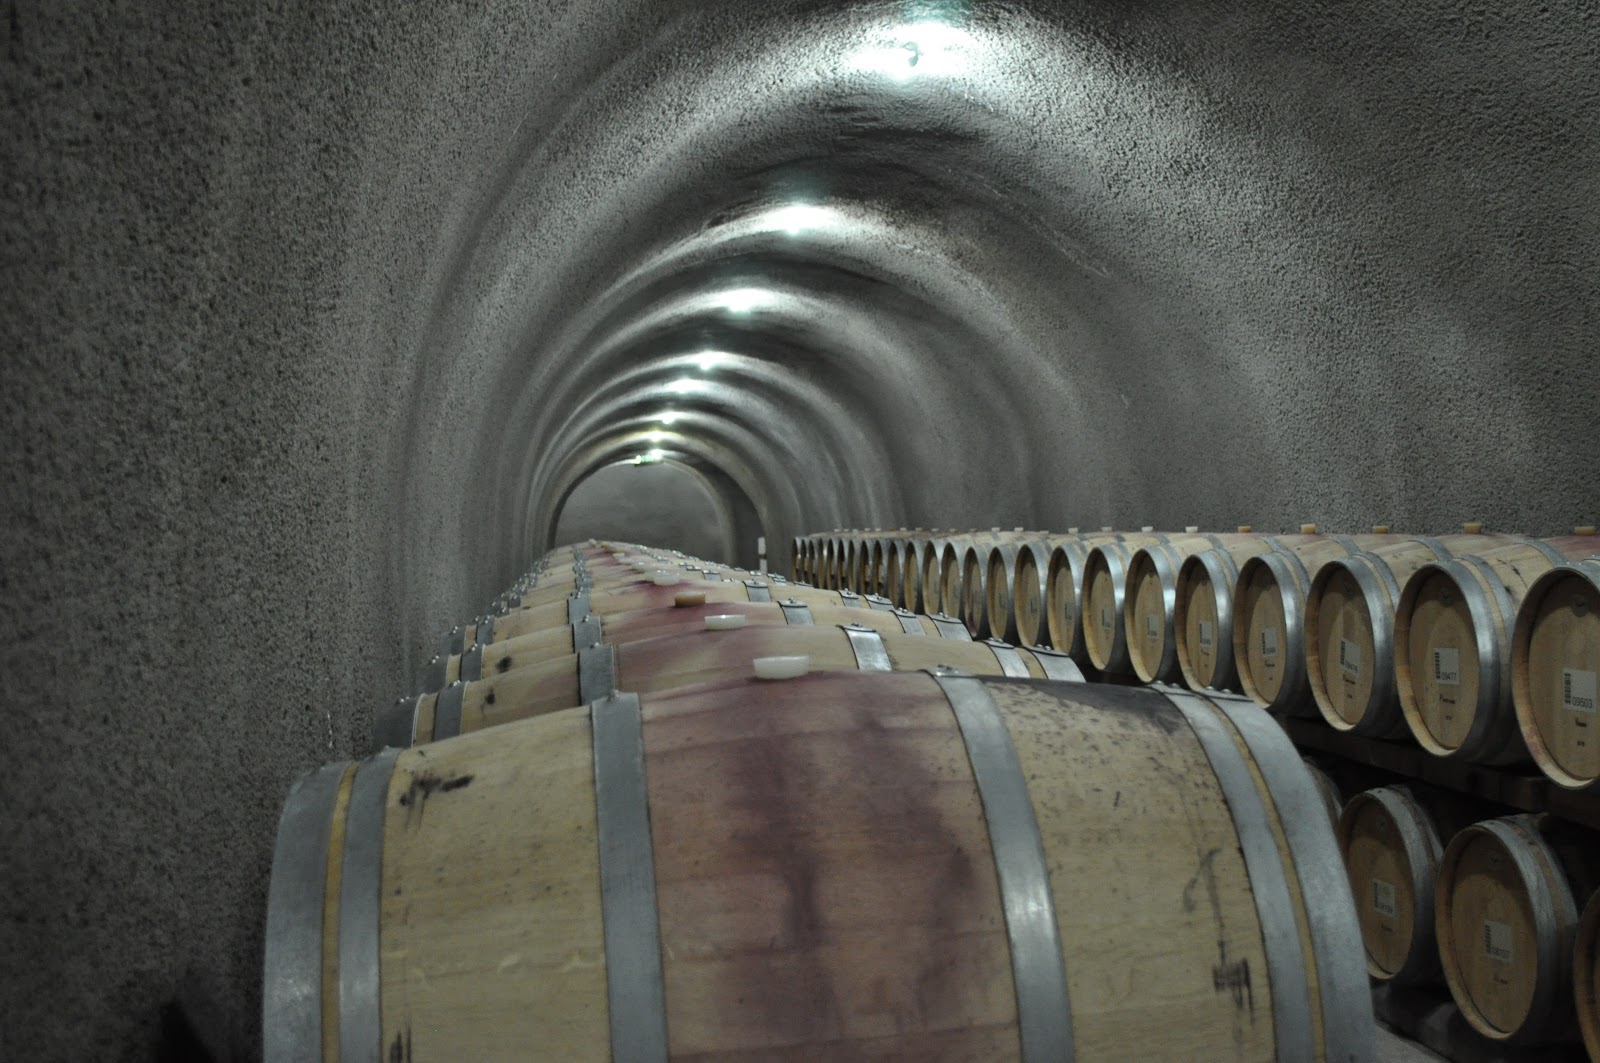

Mondavi
I read a book called the House of Mondavi and I became slightly obsessed with Mondavi (I have a habit of developing generally brief, yet intense interests in various things, right now I am riding out an elephant phase, they are FASCINATING). Mondavi is an iconic winery, and by that I mean the Robert Mondavi Winery, not to be confused with Charles Krug or CK Mondavi or Opus One or Woodbridge by Mondavi all which have a Mondavi family relationship in one way or another (read the book if you want to know more, it is quite dramatic, especially if you skim over the more business/financially oriented sections). Robert was a key player in making the California wine scene what it is today and I think it seems fitting to visit his winery. And, while I don't believe the wine has the reputation it once did, it is still pretty good.
Artesa

Cakebread Cellars
 Cakebread is one of the wineries that requires a reservation, but we stopped by after lunch on a Tuesday and there was no problem getting in for a tasting. They take each group to a different location on the property for their tasting, which is nice, we ended up on the patio, but they say you could end up in the fermentation room, the barrel room or next to the vines. Cakebread is one of the places where the wine outshone the setting, and I liked every wine that was poured. Also, my tasting happened to be led by a chef, who talked about what foods she would have paired with every wine, which was perfect for me.
Flora Springs

 I have had a long relationship with Flora Springs, the estate (which houses the winery, there is a tasting room on highway 29 that is not as cool) is literally right down the street from my grandmother's house. In fact, we used to ride our bikes through the Flora Springs vineyards, it may or may not have been considered trespassing, but my grandfather was the one who showed us the dirt roads that crisscrossed the property so I figure it was ok. Being neighbors we had a complimentary tour and tasting that sort of knocked our socks off. There were hardly any other people, so it felt like we were at our own private villa being wined and dined (and by dined I mean they brought out little dishes of aged gouda, almonds, cashews, crackers and chocolate). The wine and the setting were both quire nice and we ended up spending quite a lot of time there, quite a lot meaning multiple hours. It is another place where you need reservations, but I think if you are going to do just one tour, this should be it.
 Mumm Napa
Mumm is my favorite sparkling wine place in the valley, the setting is gorgeous and you can get a flight of wine so you can taste it side by side which is a bit unusual. In the past we have gone and gotten a bottle or two for the table and each have a glass (or two, but no more as we learned they have a two flute max) instead of doing a tasting, but I am not sure if they do that anymore. According the Mumm tour guide, they have the smallest bubbles, smaller than say, Chandon, the other makers of sparkling wine I have visited there. Now I have never done a taste test, nor do I know how one would measure the average bubble size in a bottle of bubbly but I do know that Mumm has bubbles that are quite lovely and they do actually seem smaller than some of the, shall we say, less costly ones I have tasted.
And these are only a few of the dozens of possibilities, drive around, stop in where ever strikes your fancy, you may find a gem, it's all part of the fun.
Friday, August 19, 2011
Emma's Eats visits the Napa Valley
My grandmother lives in a little town in the Napa Valley, and as kids when we visited we spent the entire time in the pool (we were kinda into choreographing synchronized swimming routines for awhile) except when we were riding our bikes or running around the vineyards. My sister and I used to wear our bathing suits under our clothes on the plane so we could jump right in the pool as soon as we got arrived. True story. We always had fresh sourdough bread, corn on the cob, homegrown tomatoes and peaches and, once In-n-Out made it that far north we ate there at least once during our trip. Eventually we began branching out and here are a few of my top picks for food and wine in the Napa Valley.
 For breakfast, if you are around on saturday or sunday you should stop by Bouchon Bakery in Yountville for doughnuts, they offer 2 different types (check their facebook page to see which ones are being featured) and there will be a line so be prepared to wait. The chocolate ones are a bit intense, I would recommend one with a fruit filling instead. Also, if any members of your party are too desperate for coffee to wait in the big line, you can always go around the corner to the express window. There is an outdoor seating area, although there are a few too many birds swooping in for crumbs for me to be entirely comfortable. Fridays I like to get my pastry fix at the St. Helena Farmers Market in Crane Park, volunteers staff a table with a selection of baked goods from several different area bakeries. Go early to get the best selection and make sure to check out the bocce players along with the the veggies, fruits and beautiful flowers. If you happen to be in St. Helena mon-thurs you can always grab a delicious english muffin sandwich in the Model Bakery, right on Main Street.
 For lunch check out the Oxbow Public Market in Napa, they have arepas that I hear are very authentic. They are a sort of grilled corn cake sandwich, that you can get filled with chicken, beef or beans. They are delicious. If Venezuelan isn't your thing, Oxbow also has restaurants selling oysters, pizzas, tacos, wine, cupcakes and ice cream (and yes I realize wine is not exactly food, but a wine bar serves food, so it counts). If you would rather save your cash for wine tasting, stop by Oxbow on tuesday evenings for locals night when you can take advantage of the specials and save a few dollars, for example at the Oxbow Wine Bar carafes are $2 off and draft beer is $1 off.
 Of course I have to mention Taylor's/Gott's (there was some controversy over the name, it's all very dramatic and would make for a good Lifetime movie, officially it's Gott's now, but half the time I still call it Taylor's and the old Taylor's sign still hangs out by the road). There are three now, one in San Francisco, one in the Oxbow Market and the original, in St. Helena. It's a burger place, but since this is the Napa Valley it's a burger place with a wine list and a $1 corkage fee. The milkshakes are worth mentioning (quite delicious) as are the lines (quite long at lunch and dinner but practically nonexistent at 3 or 4 in the afternoon).

 For breakfast, if you are around on saturday or sunday you should stop by Bouchon Bakery in Yountville for doughnuts, they offer 2 different types (check their facebook page to see which ones are being featured) and there will be a line so be prepared to wait. The chocolate ones are a bit intense, I would recommend one with a fruit filling instead. Also, if any members of your party are too desperate for coffee to wait in the big line, you can always go around the corner to the express window. There is an outdoor seating area, although there are a few too many birds swooping in for crumbs for me to be entirely comfortable. Fridays I like to get my pastry fix at the St. Helena Farmers Market in Crane Park, volunteers staff a table with a selection of baked goods from several different area bakeries. Go early to get the best selection and make sure to check out the bocce players along with the the veggies, fruits and beautiful flowers. If you happen to be in St. Helena mon-thurs you can always grab a delicious english muffin sandwich in the Model Bakery, right on Main Street. For lunch check out the Oxbow Public Market in Napa, they have arepas that I hear are very authentic. They are a sort of grilled corn cake sandwich, that you can get filled with chicken, beef or beans. They are delicious. If Venezuelan isn't your thing, Oxbow also has restaurants selling oysters, pizzas, tacos, wine, cupcakes and ice cream (and yes I realize wine is not exactly food, but a wine bar serves food, so it counts). If you would rather save your cash for wine tasting, stop by Oxbow on tuesday evenings for locals night when you can take advantage of the specials and save a few dollars, for example at the Oxbow Wine Bar carafes are $2 off and draft beer is $1 off. Of course I have to mention Taylor's/Gott's (there was some controversy over the name, it's all very dramatic and would make for a good Lifetime movie, officially it's Gott's now, but half the time I still call it Taylor's and the old Taylor's sign still hangs out by the road). There are three now, one in San Francisco, one in the Oxbow Market and the original, in St. Helena. It's a burger place, but since this is the Napa Valley it's a burger place with a wine list and a $1 corkage fee. The milkshakes are worth mentioning (quite delicious) as are the lines (quite long at lunch and dinner but practically nonexistent at 3 or 4 in the afternoon).
 We basically only go to one place for dinner, Rutherford Grill. It is known for its smokily delicious meats and while you wait for your table out front (and you will most likely wait, even if you do have a reservation) you will be able to smell why, it smells amazing out there. There is no corkage fee, so we bring a couple bottles of wine (I feel like I should mention this is a family tradition and there are about seven of us drinking said bottles of wine, we don't each drink a few, we aren't that big a family of lushes). You should probably get the cornbread, I hear it has bacon fat in it, do I need to say more? My cousins swear by the ribs, we all love the wild rice salad that is one of the sides, so much so that we got the recipe last year, and I don't think my mother has ever not gotten the chicken dip sandwich, which is technically not on the menu anymore.
This is getting a bit long, so I will wrap it up with a list of my suggestions (and add a few more I didn't mention above) and links where you can find more information and bring you part two later, with my favorite wineries.
For Doughnuts: Bouchon Bakery
For Pastries: St. Helena Farmers Market
For Breakfast Any Day of The Week: Model Bakery
For Areaps: Pica Pica Maize Kitchen in the Oxbow Market
For Burgers: Gott's/Taylor's
For Dinner: Rutherford Grill
For Coffee: Napa Valley Coffee Roasting Company and Ritual Coffee Roasters
For Mexican: Villa Corona
Monday, August 15, 2011
Lemon Bundt Cake


Start by greasing and flouring your bundt pan, I am paranoid about my bundts sticking so I am a bit obsessive about this step. I also got a nice heavy one and cool the cakes in it for 10 minutes before flipping them out. Then cream the butter and sugar. Next add the eggs one at a time.

In a separate bowl mix together the dry ingredients, which you may or may not want to sift, depending on how lazy you are feeling at that particular moment. Then add 1/3 of the flour to the butter and egg and sugar mixture, mix gently also known as folding, add half of the buttermilk (or if you are like me, the milk that has a splash of lemon juice in it or the powdered buttermilk route, where you want to put the powder in with the dry stuff and then just water for this step which looks a bit gross but works really well), mix, add 1/2 of the remaining flour, mix, then the rest of the buttermilk, mix, then the rest of the flour. (I don't know why I felt the need to spell out the alternating in that step for you....)

Next zest and juice your lemons into the batter and fold them in. I would highly recommend using one of these juicers, they work really well.

Dump the batter into the carefully prepared pan and bake for about an hour. Once the cake is done, let it cool in the pan for 10 minutes before flipping it out.

If you want, you can make a simple glaze with powdered sugar and lemon juice, I always end up estimating the measurements for glazes and then tweaking them to get them to the consistency I want. Slice generously and serve.
Thursday, March 17, 2011
Happy St. Patrick's Day! AND Guinness Cupcakes with Bailey's Frosting
 |
| Guinness Bottles |

Start with a Guinness. One cup of it to be exact.

Melt the butter in the Guinness then whisk in the cocoa powder. This will smell pretty tasty at this point, you may even be tempted to taste it, I would advise against that. It's like vanilla, I always thought it would taste good because it smells so good. Not the case.

Meanwhile mix the sour cream and eggs together, I thought it made a lovely yellow.

Then mix your beer and cocoa into the egg mix. Next add the dry ingredients and mix until just blended. Pretty standard cupcake procedure.

Fill your cupcake tins 2/3 of the way full (I have taken to ALWAYS using cupcake papers because its just too tragic if they stick) and bake for about 20 minutes at 350.

Once the cupcakes are cool, whip up the frosting. I let the KitchenAid go to town on a stick of butter, an entire package of powdered sugar and 5 tablespoons of knockoff Bailey's until it was well mixed.

Slather thickly onto the cupcakes and enjoy.
Guinness Cupcakes from Our Family Eats
1 cup Guinness or other ridiculously dark beer of your choice
2 sticks butter
3/4 cup cocoa powder
2 cups flour
2 cups sugar
1 1/2 tsp. baking soda
3/4 tsp. salt
2 eggs
1/2 cup sour cream
Preheat the oven to 350 and line 24 muffin tins with cupcake papers.
Put the Guinness and butter into a saucepan over medium heat until the butter melts. Whisk in the cocoa powder and remove from heat.
Whisk together the four, sugar, baking soda and salt, set aside.
In a separate bowl (preferably one on an electric mixer) beat the eggs and sour cream together until combined. Make sure your beer/butter/cocoa mixture isn't too hot (otherwise it can scramble your eggs and no one wants that) then add that to the egg mixture, beat until just combined. Slowly add the flour mixture and mix until combined, this is the stage where you really don't want to overmix, otherwise the cupcakes will get tough.
Pour batter into the muffin tins, filling each 2/3 of the way full. I ended up with enough batter for 24 regular size cupcakes and about 10 mini ones. The regular size ones took 20 minutes and the minis took 11. Let cool completely. Now, for the frosting.....
Bailey's Frosting also from Our Family Eats
1 stick butter, room temperature
1 pound powdered sugar
5 Tbs. Bailey's (or Ryan's as it were, a more affordable Bailey's)
Cream the butter, slowly add the powdered sugar and Bailey's and mix until it is all thoroughly combined, depending on your preferred texture and taste you can tweak this frosting recipe as you see fit. For example, for less of that Bailey's flavor sub out some of the Bailey's with milk.
Saturday, March 5, 2011
Peanut Butter and Jelly (or Nutella) Bars
 I am aware that in some places peanut butter has become a class c controlled substance, I myself work in a "peanut aware" environment, however for those of you who can eat peanut butter with wild abandon, you should make these. And probably share them, otherwise you may be staring at the pan and wondering how you managed to eat the vast majority of them in approximately 24 hours. Some of you may know that I am possibly the most indecisive person ever, it took me weeks to decide on a new cell phone plan, Cheesecake Factory style menus are a nightmare because there are far too many options, and I can spend ages trying to pick a movie to watch on Netflix. Needless to say, I couldn't decide what filling to sandwich between the two peanut butter cookie layers in these bars, so I made a big pan and filled half with raspberry jam and the other half with Nutella. And now, I cant decide which I liked better, both are such delicious and classic combinations, so good luck deciding what to do if you make them. I am full of helpful suggestions aren't I? I tweaked this recipe ever so slightly, although if you wanted to, you could just use this technique and substitute your favorite peanut butter cookie dough recipe instead.
It starts like a basic peanut butter cookie, grease (or line) the pan, let the eggs and butter come to room temperature and mix the dry ingredients together.

Then cream the butter, peanut butter and sugars together, add the eggs and vanilla and then mix in the dry stuff.

Split the dough in half and press half into the bottom of a 9x13 pan and put the second half in the freezer.

Spread your desired filling on the dough, I have half nutella and half seedless raspberry jam. I didn't measure this, just eyeballed it, keep in mind that the cookie bit is pretty thick so you want a good filling to cookie ratio so that you can taste it through all the peanut butter.

Take the second half of the dough from the freezer and crumble it over the top. I didn't use quite all the dough because it seemed like too much, once the fillings were completely covered I took the rest and made a bonus cookie.

Bake at 350 for about 30 minutes, the tallest bits of the crumble should be a nice golden brown. Let cool before cutting.
Peanut Butter and Jelly (or Nutella) Bars from Sweet Pea's Kitchen
3 cups flour
1 tsp. baking powder
1/2 tsp. salt
1 1/2 cups peanut butter
1 1/2 cups brown sugar
2 sticks butter, room temperature
2 eggs
2 tsp. vanilla extract
3/4 cup jelly (approximately)
3/4 cup nutella (approximately)
Preheat oven to 350 and either grease well or line a 9x13 pan.
Mix flour, baking powder and salt together and set aside.
Cream the peanut butter, brown sugar and butter until smooth, then mix in the eggs and vanilla. Add the dry ingredients and mix until just combined.
Press half of the dough into the bottom of the pan and put the rest in the freezer.
Spread the jelly over half the pan and spread the nutella over the rest, or substitute whichever filling you so desire.
Cover the filling with the remaining dough, crumbling it into chunks about as large as marbles.
Bake for 30 minutes. Cool before cutting.
Subscribe to:
Posts (Atom)