Thursday, March 17, 2011

Happy St. Patrick's Day! AND Guinness Cupcakes with Bailey's Frosting

Guinness Bottles
Like all good Americans with any connection to Ireland, no matter how remote, I am a fan of St. Patrick's Day.  When I was in preschool the leprechauns would visit and on March 17th we would wake up to little green footprints, green milk and even green toilet bowl water (I just asked my dad if he would do this for me again so I could relive my childhood, and I'm not gonna lie, I would be super excited to wake up to a green toilet [update: he did it! Best dad ever]).  Anyways, most people switch over from green milk to green beer at some point and these cupcakes are a nod to the boozy reputation of the Irish.  If you peruse the foodie blogs at all you have probably come across some variation of the Guinness cupcakes with Bailey's frosting, if not well, here you are.  I thought they would be fun to make and a good holiday gimmick (a sort of 'beer in cupcakes, ha, how appropriate for St. Paddy's' kind of thing) but I honestly didn't expect you to really be able to taste the Guinness.  You can.  You can also taste the Bailey's in the frosting, which was so good some ate it with spoons right out of the bowl.  The stout cuts the sweetness some and adds an unexpected depth of flavor, and well Bailey's is just delicious.  This is most definitely my new favorite way to have Guinness, well aside from the Gravity Bar at the top of the Guinness storehouse and even there I could only manage half a pint, and as I can't really jet off to a rooftop bar in Dublin these cupcakes will have to do when I get a hankering for some Guinness.  I found the recipe on Our Family Eats.

  
Start with a Guinness.  One cup of it to be exact.

Melt the butter in the Guinness then whisk in the cocoa powder.  This will smell pretty tasty at this point,  you may even be tempted to taste it, I would advise against that.  It's like vanilla, I always thought it would taste good because it smells so good.  Not the case.

Meanwhile mix the sour cream and eggs together, I thought it made a lovely yellow.

Then mix your beer and cocoa into the egg mix.  Next add the dry ingredients and mix until just blended.   Pretty standard cupcake procedure.

Fill your cupcake tins 2/3 of the way full (I have taken to ALWAYS using cupcake papers because its just too tragic if they stick) and bake for about 20 minutes at 350.

Once the cupcakes are cool, whip up the frosting.  I let the KitchenAid go to town on a stick of butter, an entire package of powdered sugar and 5 tablespoons of knockoff Bailey's until it was well mixed.

Slather thickly onto the cupcakes and enjoy.

Guinness Cupcakes from Our Family Eats
1 cup Guinness or other ridiculously dark beer of your choice
2 sticks butter
3/4 cup cocoa powder
2 cups flour
2 cups sugar
1 1/2 tsp. baking soda
3/4 tsp. salt
2 eggs
1/2 cup sour cream

Preheat the oven to 350 and line 24 muffin tins with cupcake papers. 

Put the Guinness and butter into a saucepan over medium heat until the butter melts.  Whisk in the cocoa powder and remove from heat.

Whisk together the four, sugar, baking soda and salt, set aside.

In a separate bowl (preferably one on an electric mixer) beat the eggs and sour cream together until combined.  Make sure your beer/butter/cocoa mixture isn't too hot (otherwise it can scramble your eggs and no one wants that) then add that to the egg mixture, beat until just combined.  Slowly add the flour mixture and mix until combined, this is the stage where you really don't want to overmix,  otherwise the cupcakes will get tough.

Pour batter into the muffin tins, filling each 2/3 of the way full.  I ended up with enough batter for 24 regular size cupcakes and about 10 mini ones.  The regular size ones took 20 minutes and the minis took 11.  Let cool completely.  Now, for the frosting.....

Bailey's Frosting also from Our Family Eats
1 stick butter, room temperature
1 pound powdered sugar
5 Tbs. Bailey's (or Ryan's as it were, a more affordable Bailey's)

Cream the butter, slowly add the powdered sugar and Bailey's and mix until it is all thoroughly combined, depending on your preferred texture and taste you can tweak this frosting recipe as you see fit.  For example, for less of that Bailey's flavor sub out some of the Bailey's with milk.


Saturday, March 5, 2011

Peanut Butter and Jelly (or Nutella) Bars

I am aware that in some places peanut butter has become a class c controlled substance, I myself work in a "peanut aware" environment, however for those of you who can eat peanut butter with wild abandon, you should make these.  And probably share them, otherwise you may be staring at the pan and wondering how you managed to eat the vast majority of them in approximately 24 hours.  Some of you may know that I am possibly the most indecisive person ever, it took me weeks to decide on a new cell phone plan, Cheesecake Factory style menus are a nightmare because there are far too many options, and I can spend ages trying to pick a movie to watch on Netflix.  Needless to say, I couldn't decide what filling to sandwich between the two peanut butter cookie layers in these bars, so I made a big pan and filled half with raspberry jam and the other half with Nutella.  And now, I cant decide which I liked better, both are such delicious and classic combinations, so good luck deciding what to do if you make them.  I am full of helpful suggestions aren't I?  I tweaked this recipe ever so slightly, although if you wanted to, you could just use this technique and substitute your favorite peanut butter cookie dough recipe instead.      

It starts like a basic peanut butter cookie, grease (or line) the pan, let the eggs and butter come to room temperature and mix the dry ingredients together.

Then cream the butter, peanut butter and sugars together, add the eggs and vanilla and then mix in the dry stuff.

Split the dough in half and press half into the bottom of a 9x13 pan and put the second half in the freezer.

Spread your desired filling on the dough, I have half nutella and half seedless raspberry jam.  I didn't measure this, just eyeballed it, keep in mind that the cookie bit is pretty thick so you want a good filling to cookie ratio so that you can taste it through all the peanut butter.

Take the second half of the dough from the freezer and crumble it over the top.  I didn't use quite all the dough because it seemed like too much, once the fillings were completely covered I took the rest and made a bonus cookie.

Bake at 350 for about 30 minutes, the tallest bits of the crumble should be a nice golden brown.  Let cool before cutting.

Peanut Butter and Jelly (or Nutella) Bars from Sweet Pea's Kitchen
3 cups flour
1 tsp. baking powder
1/2 tsp. salt
1 1/2 cups peanut butter
1 1/2 cups brown sugar
2 sticks butter, room temperature
2 eggs
2 tsp. vanilla extract
3/4 cup jelly (approximately)
3/4 cup nutella (approximately)

Preheat oven to 350 and either grease well or line a 9x13 pan.
Mix flour, baking powder and salt together and set aside.
Cream the peanut butter, brown sugar and butter until smooth, then mix in the eggs and vanilla.  Add the dry ingredients and mix until just combined.
Press half of the dough into the bottom of the pan and put the rest in the freezer.
Spread the jelly over half the pan and spread the nutella over the rest, or substitute whichever filling you so desire.
Cover the filling with the remaining dough, crumbling it into chunks about as large as marbles.
Bake for 30 minutes.  Cool before cutting.


Sunday, February 13, 2011

Adorable Toast

image via Breakfast

Is this not the cutest piece of toast you have seen?  Check out Miss Moss's breakfast tumblr for more great breakfast pictures.  I'm warning you, you may end up with a craving for some toast and eggs with runny yolks afterwards....

Thursday, February 3, 2011

Parker House Rolls via Pioneer Woman

Our family holidays tend to revolve around food, which is super original of us, obviously.  This Christmas, we went to the country and had what I suppose you would call lunch, which for me consisted of eating my weight in crab balls and sampling everything else, including deer bologna (which according to my cousin, you aren't a real man unless you have some deer bologna in the fridge).  Then we came home for some crab chowder and these parker house rolls I found on PW's website.  The rolls were amazing, which tends to be the case when there is a stick of butter in the rolls themselves, and then you dip them in melted butter before baking and then for good measure slather a bit more on before eating.  They were so good I made them a week later for our traditional New Year's day turkey dinner (which strongly resembles a Thanksgiving turkey dinner only a smidge smaller).  Here is a link to the recipe on PW's site "Parker House Rolls"

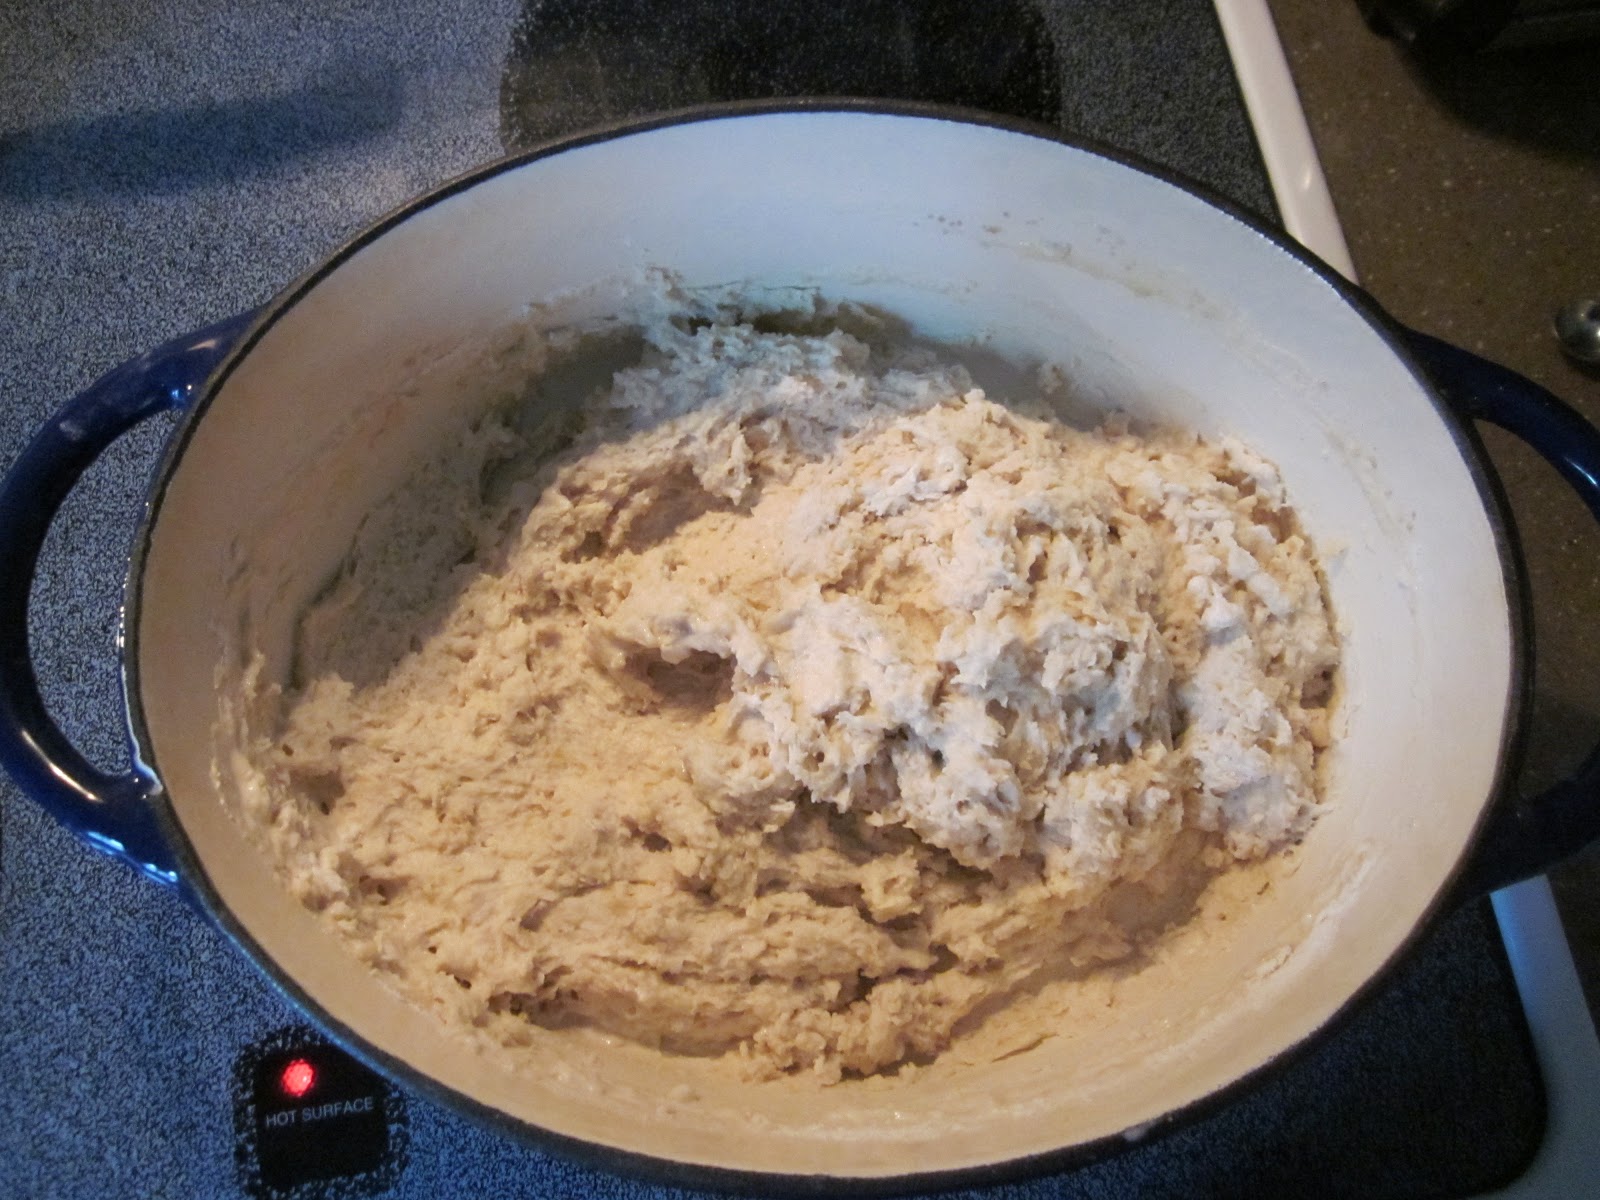
You start out by scalding the milk and melting the butter and dissolving the sugar all together in a large pot, I use a dutch oven.  Then you let it hang out and cool down a bit, while you do something productive, like watch an episode of 30 Rock.

Once the milk has cooled some, stir in the yeast and most of the flour, then cover and let it rise for an hour (which is where the dutch oven complete with lid comes in handy, no fiddling around with saran wrap which never does what I want it to).  Next stir in the rest of the dry ingredients, after which you knead for a couple minutes, and then let it rest/rise for another half an hour.  At this point you could pop it in the fridge instead of letting it rise and then either bake the rolls several hours later (as in make the dough in the morning and then bake them in the evening) or the next day.

After the dough has risen, either on the counter or in the fridge, roll it out to about half an inch thick.  I find it is easier to roll when it is chilled, and the more I work with it, the harder it gets to cut out neat little rounds, in fact at the very end I smooshed the rest of the dough into a blob, tried to flatten it out and then dunked it in the butter, sort of folded it and ended up with a misshapen monster roll that became known as Austin's roll, which if I am not mistaken, he quite enjoyed.  Anyways, back to the point, roll out the dough, cut out circles, dunk them in melted butter and then fold in half and pop them on a cookie sheet.

Let the butter soaked rolls rise once more and then bake until golden.  Just see if you can resist eating one right out of the oven.

Parker House Rolls from The Pioneer Woman
2 cups milk
1 stick butter
1/2 cup sugar
2 1/4 teaspoons active dry yeast
4 cups flour
1/2 teaspoon (heaping) baking powder
1/2 teaspoon (scant) baking soda
1 tablespoon (heaping) salt
1/2 cup additional flour
2/3 stick additional butter

Combine milk, a stick of butter and sugar in a dutch oven, bring to a simmer, but don't boil it, then turn it off and let it cool to lukewarm, about 30 min.

Stir in the yeast and four cups of flour.  Cover and let rise an hour.  Then stir in the additional flour, salt, baking soda and powder.  Turn out onto a floured surface and knead for about 10 min.  Cover with a tea towel and let rise for 30 more minutes, or pop in the fridge and let rise overnight or for several hours at least.

Preheat oven to 400, and melt the rest of the butter.  Roll dough out to about 1/2 inch thick and cut out rounds.  Dunk each round in melted butter, fold and place on a cookie sheet to rise for another 30 min.  Bake for 15 min. 

Tuesday, January 25, 2011

Maple Walnut Bundt Cake

I have a new obsession with bundt cakes, and by new I mean I bought my first bundt pan yesterday, whipped this cake up and have been trolling the internets and every cookbook in the house for bundt cake recipes ever since.  I am planning on making a lemon one tonight in fact.  I really cannot figure out what exactly it is that draws me to these, it could be that you don't have to decorate them at all, which as you may or may not know decorating cakes and such is NOT my forte by any stretch of the imagination (I struggled with making one of those bunny cakes at Easter, you know the kind that everyone and their grandmother can make, although in my defense it was gluten free and thus an unusual texture).  There is also the fact that they tend to be on the denser side which I prefer and how particular I am about my cake to  frosting ratio which isn't a problem as most of these cakes just call for a glaze or a dusting of powdered sugar.  Or maybe it's the pans, which I have decided to start collecting along with cake stands (I want this one and this one for starters).  They also have a delightfully retro feel to them.

Start by making the nutty filling.  Flour, butter, cinnamon, walnuts (or pecans, which is what the recipe calls for, but we had a big bag of walnuts in the pantry)....

...and of course, maple syrup.  It is a bit hard to tell the scale in this picture, but it is in fact a half gallon jug of the stuff, hand delivered from New Hampshire.  
      
Then cream some butter and sugar together, pretty standard.  Next, in a separate bowl, mix the dry ingredients together, also pretty standard.

Now here is where it gets a bit fiddly.  You add a single tablespoon of the the flour mixture and beat it in, then add an egg, then another single tablespoon of flour mixture then the other egg.  I have no idea why 2 tablespoons of flour make enough of a difference to merit the explanation required, but there you have it, this cake is delicious so I won't argue.  Then you add the rest of the flour and then the sour cream.  

You will end up with a dough that definitely cant be poured into the pan, but will instead need to be manhandled a bit to get it to obey.  

The recipe makes a big deal about making a rim up around the edges of the pan thus creating a dent all around the ring for the filling to go in and making sure it doesn't leak out.  Either I did a much better job of sealing my filling in than I thought I was or it isn't that big of a deal.  Anyways, you end up with half the dough on the bottom, a ring of the filling in the middle and then top it off with the rest of the dough, doing your best to cover over all the filling.

Bake until done and then let cool in the pan for 10 minutes before flipping it out.

Maple Walnut Bundt Cake (from Nigella Kitchen by Nigella Lawson)
Filling:
1/2 cup flour
2T butter, softened
1t cinnamon
1 1/4 cup walnuts, roughly chopped (or pecans)
1/2 cup maple syrup

Cake:
2 cups flour
1t baking powder
1t baking soda
9T butter, softened
3/4 cup powdered sugar
2 eggs
1 cup sour cream

10 cup bundt pan

Preheat oven to 350 and grease pan well, you can use pam with flour in it, but I use crisco on a paper towel and then shake some flour around in the pan.

Make the filling, mix the butter and flour together with a fork until it looks like a crumb topping, then mix the rest of the ingredients in with the fork until blended.

Then mix the flour, baking powder and baking soda in bowl and set aside.

Cream the butter and sugar, then add 1T of the flour mixture, then one egg, then one more tablespoon of the flour then the other other egg.  Continue to add the flour mixture, beating as you go.  When that is mixed in, add the sour cream.

Spoon just over half the batter into the bundt pan, spreading it up the sides a bit to make a rim.  You want the gooey filling sealed in.

Spoon the filling into the dent in the cake batter, then cover with the rest of the batter.  Bake for 40 minutes, but check around 30.  Be careful not to be fooled by the filling, it will stick to the cake tester, you want to see if the cake bit is sticking to the tester.  Cool in the pan for 10 minutes before flipping it out.

Friday, January 21, 2011

Guest Blogger Tracie: Baked Risotto

My friend Tracie decided she wanted to do another guest post, so she emailed it to me.  Last August.  I promptly lost it in my email, but it has since been exhumed (after she nagged me for several weeks) and so here it is, her oven baked risotto, sorry for the delay.


Intrepid readers, I’ve made my triumphant return. I’ve missed ya’ll and I’m sure you feel likewise. In my first post I spoke (typed?) about my love for Pioneer Woman. But alas, my heart is fickle and I also love another. America’s Test Kitchen/Cook’s Country on PBS. It’s super nerdy and has none of the sex appeal of the shows on the Food Network. However, Test Kitchen seriously appeals to me because of their obsessive search to make things better, easier, and perfect. (I like perfection. I rarely attain it. My life is fraught with tension because of this.) Because I enjoy Test Kitchen’s diligence, I get their Cook’s Country magazine where I got both of these recipes. Oh and PS, the next time you see Emma, ask her about how much she loves searching for the hidden roosters in the magazine. [You should try it, it is strangely satisfying]  So, to get on with it, my family had plans to go out to eat for Father’s Day (I do realize this was months ago, yes) but one of us had to work and so instead I whipped this up. And burnt my finger, which I will tell you about in a bit.  This was my first experience with making risotto. Apparently it’s a bit difficult and inconvenient. Thankfully, the awesomeness that is Test Kitchen has come to our rescue to make this easier for us.

Le ingredients: unsalted butter, garlic, onion, parsley, Arborio rice, Parmesan cheese, water, bay leaves, low sodium chicken broth, dry white wine, and salt and pepper which I have forgotten to include.

Step one (not pictured): Preheat, which is really just regular heating and I fail to see why it is referred to as “pre,” the oven to 400 degrees. Step two: on the stove-top, simmer the broth, water, and bay leaves over medium-high heat. Cover it and keep it warm over the lowest heat possible.  While your broth is simmering away, melt the butter in a Dutch oven over medium heat. Add the onion and salt and cook until the onion browns.  Add the rice and cook it until the edges turn clear. Which sounded perplexing, but that is totally what happens. The edges turn clear and the center stays white. It’s pretty cool. Then, add in the garlic and stir it around a bit. [Tracie is all about the pictures, but I tend to favor a less is more approach, so I may have edited a few out, just imagine the broth heating and the onions browning....]

Next add in the wine and stir until it is completely absorbed.  Then, pour the broth over the rice.

Cover the Dutch oven with aluminum foil, pressing it down so it sits on top of the broth. Which, personally, I think is difficult to do because the foil picks up the heat from the risotto pretty fast. Crimp the edges of the foil around the pan too, which I also find slightly difficult due to the heat of the Dutch oven. Cover the foil with a tight fitting lid and pop it in the oven for 15 minutes.  After baking it, pull the risotto out, EXCEPT, be sure to remember that the metal lid of the pot has *just* come out of a 400 degree oven and is pretty damn hot itself. So *don’t* go picking it up all willy-nilly and then drop it, well like it’s hot, on the kitchen floor, narrowly avoiding your bare feet and burning the crap out of your fingers, most inconveniently as they are the fingers of your dominant hand. (Lefties for life!) [dork, not about the burning, but the lefties thing]

Get rid of the bay leaves, and stir in the parmesan and parsley. Season it with salt and pepper to taste.

Easy Baked Risotto (serves 6 to 8)
5 cups  low sodium chicken broth
½ cup water
2 bay leaves
4 tablespoons unsalted butter
Salt and pepper
2 cups Arbario rice (it’s important you use this particular rice, it’s risotto rice)
½ cup dry white wine (and remember, only cook with stuff you’d be willing to drink)
1 ¼ cup grated Parmesan cheese
1 tablespoon chopped fresh parsley


1. Put the oven rack on the middle shelf and heat the oven to 400 degrees.
2. Bring the broth, water, and bay leaves to a simmer in a medium-sized saucepan over medium-high heat. After bringing it to a simmer, cover the pot and keep the broth warm over the lowest possible heat.
3. While the broth is heating, melt the butter in a Dutch oven over medium heat. Add the onion and ½ teaspoon of salt and cook until the onions brown, around 6 minutes. Add the rice, stirring, and cook it until the edges of the rice become translucent, about 2 minutes. Stir in garlic and cook if for about 30 seconds, until you can smell it. Then add the wine and stir until all the liquid is absorbed.
4. Pour the broth over the rice. Cover the Dutch oven with a sheet of aluminum foil and press down so it sits on top of the broth. Crimp down the edges to form a seal and cover with a tight fitting lid.
5. Bake until the rice is tender and all the liquid is absorbed, about 15 minutes. Pick out the bay leaves. Stir in parmesan cheese and parsley. Season with salt and pepper to taste.


Stay tuned for Tracie's next guest post for Italian skillet chicken (which I promise will be up before next year)