Wednesday, January 20, 2010

Pollo alla Cacciatora

My cousin gave me this great Italian cookbook (Italian Cooking by Linda Doeser) for christmas and I couldn't wait to make something from it; after all he and his wife do have the best restaurant in West Virginia (ok so I may be a little biased, he was always my cool older cousin and the only white guy that I have met who can pull off dreads while still looking like someone you would want handling your food, which says a lot, but still....). Like pretty much everything else I make this chicken is easy, the worst part was taking the skin off, but that just may be me and the fact that I tried to take the skin off the wings with a pair of dull kitchen scissors and didn't have a fortifying glass of wine beforehand like my dad suggested. Other than that, there is something comforting about this dish, the dutch oven full of chicken and sauce happily bubbling away in the oven for an hour.


Start with butter and oil, always a good beginning if you ask me.


Brown your (mostly) skinless chicken (I gave up on the wings after 15 minutes, which i think shows a surprising amount of perseverance/stupidity).


In the same pot, full of all those good brown bits, cook the red onions for about 10 minutes.


Toss in everything else, except the mushrooms, although I have decided that it would probably be perfectly fine to add the mushrooms at this stage. Bring the sauce to a boil and then toss the chicken back in, cover it and pop the whole thing in the oven.


After it has been cooking for about 45 minutes, it's time to add the mushrooms.


MMMMMmmm mushrooms. Not. I am not fond of mushrooms but my parents are, the things I do for them...


Slide all those mushrooms down in there, and push them down into the sauce so that they soak it up and taste more like oniony, chickeny, tomatoey goodness and less like mushrooms. Cook for a bit longer, until the chicken is done.


Serve it up with some pasta or bread to soak up the juices. It may not look super pretty, but don't hold that against it, it makes up for it by being delicious.

Pollo alla Cacciatora (from Italian Cooking)
Serves 4
1/2 oz unsalted butter
2 tbsp olive oil
4 lb skinned chicken portions, bone in
2 red onions, sliced
2 garlic cloves, chopped finely
14 oz canned tomatoes, chopped
6 fresh basil leaves, torn (I accidentally killed my basil plant so I just used a sprinkle of the dried stuff)
1 tbsp sun-dried tomato paste (they didn't have this at our grocery store so I used regular tomato paste)
2/3 cup red wine
salt and pepper
8 oz mushrooms, sliced

Melt the butter with the olive oil in a flameproof casserole. Add the chicken, and cook until browned all over, about 5-10 minutes. Transfer to a plate.

Add the onions and garlic to the casserole and cook over low heat, stirring every once in awhile, until golden. Add everything but the mushrooms and bring to a boil. Return the chicken to the pot and push down into the sauce.

Cover and cook in a preheated oven, 325 degrees, for about 50 minutes. Add the mushrooms and cook 10 more minutes or until the chicken is done. Serve immediately.


Sunday, January 17, 2010

Irish Brown Bread

I studied abroad in Ireland. If you know me, I have probably already told you far too much about those six months that I lived in Galway already, if for some reason you have been spared that, I shall make up for it now. Ireland was great, I loved living in Galway, you should probably go and see for yourself. There are some things that I will never understand about the Irish, such as their showers/hot water heaters, or why they take exams at the racecourse, or why 95% of the coffee in the country is utter crap, or why the skittles there taste different, but there are other things that I can fully get behind. For example, curry chips, french fries with curry sauce, amazing. Or the thousands of pubs. Or the big bottles of Bulmers (you can actually get that here, it's called Magners though, it is the same hard cider just with a different name). Or the tart shop. Or the stone walls, I liked the stone walls. Or the cliffs, so amazing. Anyways, if you ever make it to Ireland, I would strongly recommend that you always get the brown bread (for example with the full Irish breakfast that I am sure you will be eating at some point, if they say and would you like toast or brown bread the right answer is always brown bread). I really like the brown bread, and this recipe is as close as you can get using american ingredients.


Mix up your dry ingredients. There are quite a few ingredients, but you really need them all, it makes the bread really delicious.


Add 2 tablespoons of butter, rub it in with your fingers to incorporate it.


Stir in 2 cups of buttermilk and dump it all in a loaf pan. See how easy this is? No kneading or letting it rise and you end up with a yummy yummy loaf of bread. Now toss it in the oven for 40 minutes. While you wait for it to bake you can look at these pictures of Ireland and pretend you are there.


Inishmore, one of the Aran islands. Biking around the island is fun, but you should really question people who tell you that you can go downhill both ways.


Galway, right after sunset, this picture is a bit dark, but I like the sky in it. You can sort of see the Claddagh at the end there, it is technically a fishing village and not really part of Galway City. It is known for the Claddagh ring and the many giant swans that hang out there who are not at all afraid of people anymore.


The cliffs of Moher. They are really famous and were in the movies the Princess Bride, and Harry Potter and the Half Blood Prince.

A part of some castle, I think Blarney castle, home of the blarney stone, which I have in fact, kissed, twice.


Ham and cheese crepe from the weekend market in Galway, delicous.


Shop street in Galway. If you were to turn left at the Bank of Ireland (which you cant really see in this picture, but it is on this street) you would find the tart shop, you should probably pick up a bakewell tart, a lemon tart, a mixed berry tart and a chocolate one if you are ever in the neighborhood.


If you now want an irish husband/wife, you can attend the Lisdoonvarna Matchmaking Festival to find one. Then invite me to the wedding.


Back to the bread though, 40 minutes later it will look like this.


Pop it out of the pan and let it cool a bit before you cut yourself and nice thick slice. It may not be the prettiest bread, but it is quite tasty.

Irish Brown Bread (from Recipe Rascal)
1 3/4 cups all purpose flour
1 3/4 cups whole wheat flour
3 tablespoons toasted wheat bran (I couldn't find wheat bran, so I just used ground flax seeds)
3 tablespoons toasted wheat germ (I don't toast it...)
2 tablespoons old fashioned oats
2 tablespoons packed brown sugar
1 teaspoon baking soda
1/2 teaspoon salt
2 tablespoons butter, cut into bits
2 cups buttermilk

Preheat oven to 425. Butter a 9x5x3 inch loaf pan. Mix everything but the butter and buttermilk. Add butter, rub it in with your fingertips until there are no more big chunks. Stir in buttermilk to form a soft dough. Transfer to loaf pan. Bake for 40 minutes or until a tester comes out clean. Turn bread out of pan and let cook on a rack.

Wednesday, January 13, 2010

Ravioli

Every christmas eve, we make raviolis. From scratch. Dozens and dozens of them. And then we (and our friends) eat them. Dozens and dozens of them. This is not quite as random as it sounds, we are italian after all. My dad did grow up watching his grandmother make raviolis, although she did not make her dough in the food processor and I hear that she rolled it out with a rolling pin and cut each ravioli individually with a water glass and sealed them one by one. We have been doing this for years, for as long as I can remember. To me raviolis will always be associated with christmas, and none will be as good as the ones I eat on christmas eve. The only thing that really changes are the fillings, we have been expanding. This year we had the classic cheese, sun dried tomato, pesto and introduced butternut squash ones. Other than that, my mom always makes the basic filling, my dad always makes the dough, my sister cranked out the dough until I was old enough and then she passed it on to me, we always debate how much dough to make, and which pasta recipe it is that we use exactly. I will post the recipe here later, but for now I will describe the process of making enough raviolis to generously feed a dozen people.


First make your fillings. I am not entirely sure what goes into the fillings as it is a closely guarded family secret. Actually, my mom makes the basic cheese filling in the morning before I wake up which is why I don't know what is in it. I do know that the pesto and sun dried tomato come in tubes of super concentrated paste that we mix with the cheese. I am usually awake for that part.


Next make your dough. It is basically flour, eggs, a bit of salt and some water.


You (meaning my dad) mix it all together in the food processor until it looks like this. Or you could do it by hand, and make a pile of flour with a well in the middle and dump in the eggs. I have never seen anyone do that in real life though, only on tv.


Now that you have the dough and the filling, it's time to assemble the ravioli. We have a snazzy ravioli maker, it "makes 12 delicious ravioli at a time"


And don't forget the pasta machine, you crank it by hand. Every year I mention that KitchenAid does in fact make a pasta maker that you attach to your mixer and it's electric and does not require cranking. Every year my dad doesn't say anything.


Now, once the kitchen has been turned into ravioli central, it's time to begin....


Cut a bit of your dough off, make sure to cover the dough that you aren't using at the moment.


Feed it through the pasta rolling machine. At this point the rollers are set fairly far apart, so the dough is still pretty thick.


But as you work through the settings, it gets thinner and thinner, until it is a lovely long, thin sheet of pasta.


Then I pass the dough down to my dad, who lays it over the ravioli tray, and uses the special secondary tray to make little wells for the filling.


About a teaspoon of filling is put in each ravioli.


Then you fold over the dough.


And then they are sealed up when you roll the rolling pin over them.


You can see the little metal ridges of the tray that divide the individual ravioli.


Then you pop the raviolis out and let them dry.


Do that over and over again, until you have a table full of raviolis.


After awhile, you should flip the raviolis. Also, so that they don't pop when you boil them, we poke a little hole in them with a toothpick. You may also need to do a little quality control and make sure that all of the raviolis have been properly sealed.


Boil them in batches, scooping them out when they are done, not dumping them out as that will break them open (or freeze them for later). And just so you know, the proper way to test for doneness (according to my great grandmother) is to eat one with some sauce on it, so you get the full effect.

Sunday, January 10, 2010

Cheesy Bread

I did not take any pictures of this recipe, nor did I measure anything, but it was so good that I wanted to share it with you anyways. This is sort of adapted from the Pioneer Woman's cheesy olive bread, but is less decadent, more of an everyday cheesy bread if you will. You can use this method and twist it however you wish to make bread with things you have on hand or to go with your meal. We happened to have a hunk of smoked gouda in the fridge, so I (ok, my father actually did all the work, I just supervised) grated about a cup and a half of the cheese. Then we mixed the grated cheese with a dollop of mayo and a dollop of sour cream. And because we were having it with chili, we added a few sprinkles of paprika and chili powder and a good grinding of fresh black pepper. For an italian meal I would add some basil and oregano. I was also thinking that it would be super tasty to chop up some artichoke hearts and mix them in. Anyways, after you have the cheesy goodness mixed up, spread it on store bought french bread. Use your judgement as to how much bread you need. We cut a good sized loaf in half and then split the half down the middle and spread the cheese on each side, ending up with 2/4th of the loaf cheesy and the rest plain. You want a good layer of cheese on the bread, but not necessarily giant mounds of cheese. The giant mounds of cheese are for when you make this. But back to the everyday cheesy bread, bake it in a 350 degree oven until the cheese bubbles and starts to brown. It really is delicious.

Wednesday, January 6, 2010

Garlic Herb Bread

I bake bread, it is one of those things that I used to think was rather difficult but now that I realize it isn't I have been getting more and more ambitious. Ok, so this bread is not actually that difficult, the braiding makes it look so much more impressive. I found this recipe here, during one of my all too frequent visits to foodgawker (if you have never seen the site, you should check it out, I once described it as 'food porn' to a friend and gave her the entirely wrong idea about what I was doing with my free time).


Start by mixing some of the flour with the garlic, salt, sugar, rosemary, basil and yeast (I didn't put in the dill, I didn't think we had any).


Heat up the milk, water and butter.


When the milk is warm enough, add it the flour mixture. At this point, it smells EXACTLY like those boxes of instant mashed potatoes, the seasoned kind, this may tempt you to taste the dough, it will be disappointing because it won't taste like mashed potatoes. Add the egg and the rest of the flour and knead a little.


After letting the dough rest, split it into thirds and roll each third into a rope. Try to keep them all the same length.


Braid the ropes, pinching the ends to seal. If you never learned the crucial life skill of braiding, please watch this video, make sure your sound is on as the soundtrack is pretty stellar.


After it rises for a bit bake the bread until it is nice and golden. At this point, you could brush it with a tablespoon of melted butter (I did, but I think it is a bit unnecessary, it is not enough to make a difference, so why bother?)


Eat when fresh, it is delicious.

Tortilla Soup

I love soups, there are just so many of them, and they go together so nicely with fresh bread. Just about every time we make a turkey my dad and I make stock from the bones to use in soups. There was one unfortunate year where we made a giant pot of stock and then forgot all about it, that poor stock had to be thrown away. If you remember to use it, I think homemade broth makes better soups, although as I learned from a commercial, most canned broths have MSG, and who can compete with that? People may be against MSG but it does make things quite tasty, all that umami (I learned about that from a book, NOT from a soy sauce commercial, I swear). Anyways, I used homemade stock in this soup, and leftover turkey, but you could always used the canned stuff. Also, this is a pretty basic recipe, feel free to jazz it up however you want. I found the recipe here, but I would use a bit more spice than called for, and if you like spicy things than I would definitely recommend adding whatever it is you prefer to spice things with, red pepper flakes, hot sauce, hot peppers, before you blend it all, because it is pretty mild as is.


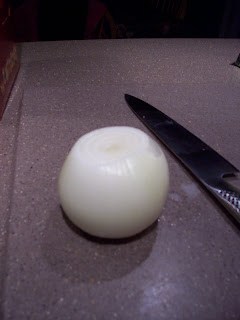
Start with one good sized onion


Chop it up along with some garlic.


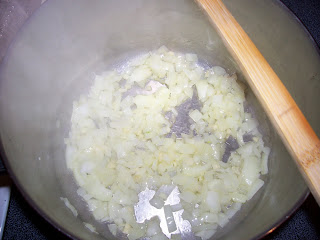
Toss the onion and garlic into the soup pot with a bit of olive oil and cook until they are nice and soft.


Add your stock and a big can of whole, peeled tomatoes. Simmer together for awhile with the spices.


Cut the tortillas into strips and toss them in the pot along with the lime juice.


Blend it all together, note the brand spankin' new immersion blender....


It will look like this once you are done blending. Now it's time to add the corn, turkey, and beans. Then you can just keep it warm until you are ready to eat it.


Get your toppings ready, I have cheddar cheese, cilantro and avocados. O and toasted tortilla strips that I forgot to take a picture of, just toss some strips on a cookie sheet and put it in the oven for a few minutes until they are golden and crunchy.


Top your soup with whatever your heart desires (the avocados were quite tasty, I would highly recommend them) and enjoy.