Friday, May 14, 2010

Chicken Mole for my Mother


I have this FABULOUS cookbook that I got in the bargain books section, Mex Tex by Matt Martinez (note how Matt cleverly switched Tex-Mex around and really made it his own). I bought it because I do, in fact, judge books by their covers, and you have to admit that this one is pretty great, don't you agree? Aside from being able to look at the cover whenever I wish, the recipes are pretty good too (at least the two I have tried) one of which is this chicken mole 'gone simple' as Matt calls it. The mole recipe alone is worth the seven dollars I spent on the book, it is that good. It is so good in fact that it is the meal my mother requested for Mother's day. I always thought mole had chocolate in it, which this one does not, so I did a little research that I will now share with you. According to wikipedia there are many different types of mole and they have all kinds of ingredients, chiles and spices, but also nuts, seeds, bananas, avocado leaves and all sorts of other things. This one doesn't have any bananas but it does have peanut butter, which I found strange until I did my research.

The chicken is poached, and while I find the combination of boiling water and meat gross, I must admit that the chicken stays very moist and the onion, celery and peppers in the water add a nice flavor. You are going to save the water and add it to the sauce later, thus keeping all the flavor in the family so to speak.


While the chicken poaches, combine your spices, it may seem like a lot, but this is where all the flavor comes from and at least you don't have to track down avocado leaves or anything like that.


Once your chicken has cooked through, let it cool enough so you can handle it then shred it. It will look like very boring, ordinary chicken, which it is, for now at least, but the sauce will change all that.


Then start on the sauce, it begins with a basic roux that you let get nice and golden.
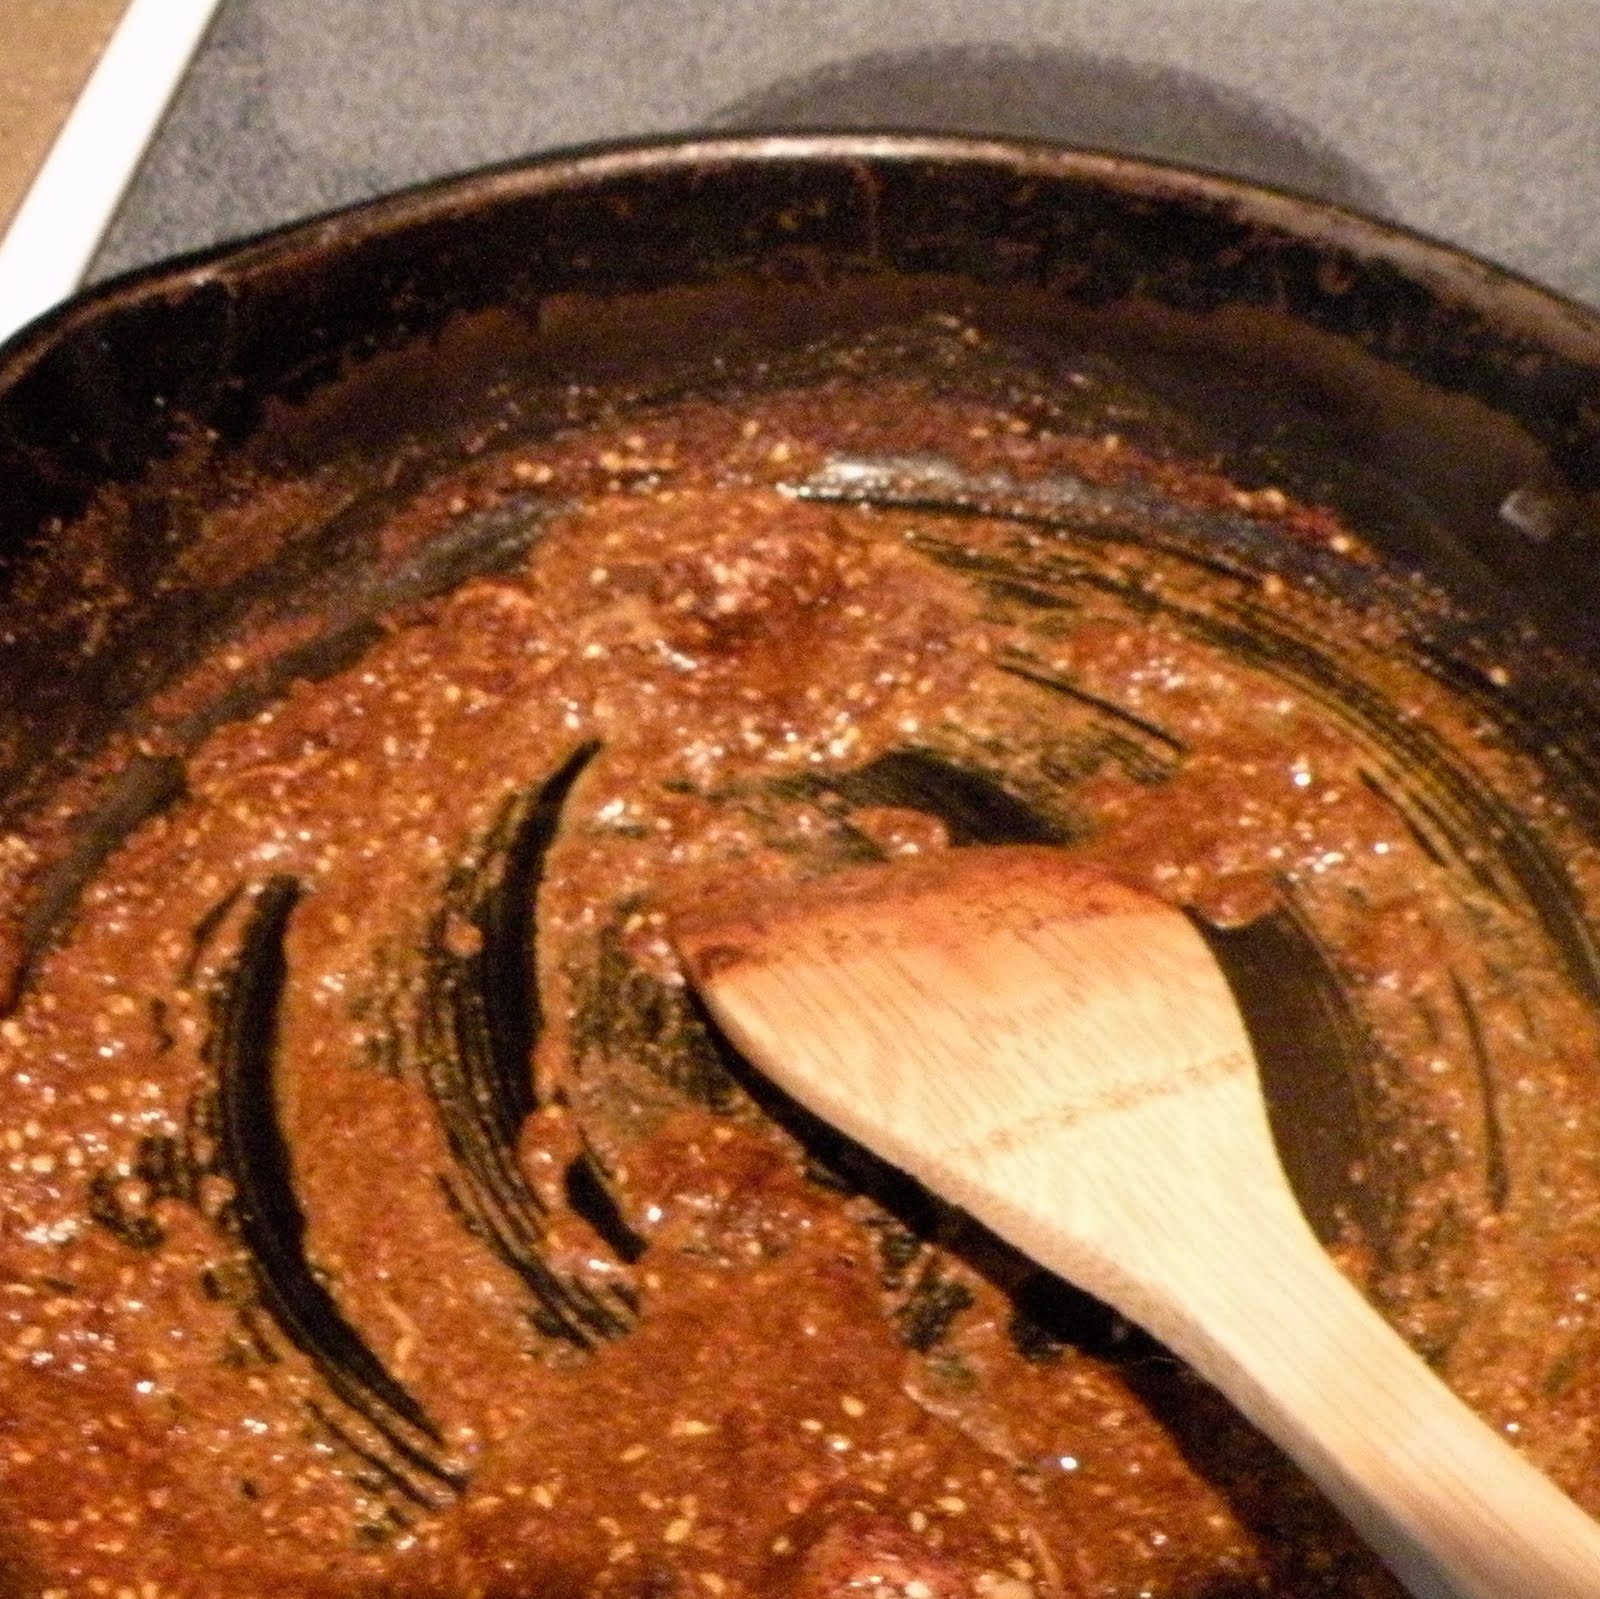
Then toss in the spices and peanut butter, and mix it all together to make an aromatic, toasted spice paste. Be sure to stir constantly so it doesn't burn.


Next add the reserved poaching liquid, pouring it through a sieve to get out all the chunks of veggies and any bits that may have come off the chicken during the poaching process. Let it simmer for a few minutes.


Then add the shredded chicken. At this point, Matt only has you cook it for 5 more minutes, but I like to let it go longer, the chicken just soaks up the sauce and the sauce has time to thicken that way. I also add a bit of Wondra to thicken the sauce more.


Look at that juicy goodness!


I like to serve it with homemade tortillas (speaking of which, you should all make them, it is super easy and they are delicious. I use the walmart brand flour tortilla mix and just follow the directions on the package).

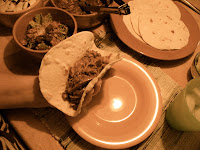
You can eat these taco style (which is quite messy, what with all the sauce, but delicious) or with the tortilla on the side to mop up all the juices.

Chicken Mole Gone Simple from Mex Tex by Matt Martinez
4 cups water
2 lbs chicken breast
1/4 cup chopped onion
1/4 cup chopped celery
1/4 cup chopped green bell pepper
pinch of salt
2 T veggie oil
2 T flour
2 T chili powder
2 T creamy peanut butter
1 T roasted sesame seeds
1 t granulated garlic
1 t paprika
1 t cumin
1 t salt
1/2 t sugar

Place chicken, onion, celery, pepper, and salt in a large saucepan; cover with the water. Bring to a boil then reduce heat to low, cover and simmer for about half an hour, until the chicken is tender. Remove chicken from the broth and let cool then shred, reserve the liquid. In a large skillet over medium heat, heat the oil then add the flour. Stir constantly until the flour turns golden brown, then add the chili powder, peanut butter, sesame seeds, garlic, paprika, cumin, salt and sugar. Stir in the reserved broth and let simmer for a few minutes. Add the shredded chicken and simmer for 10 minutes more, at the very least. You can let it go for a half an hour no problem, also you can add some wondra or flour if you want a thicker sauce.

Thursday, May 6, 2010

Bagels

I have a deep and true love of carbs. My mom talks about how having protein for breakfast is so wonderful and filling, but for me, if there is no bread type item involved then it isn't breakfast. Which is where these bagels come in, they are delicious for breakfast, or really any time of day, they also make wonderful sandwiches (especially if you toss them on Georgie and they get nice and toasty and melty). The recipe is one of Nigella's (I love her, if my kitchen had a patron saint it would probably be her with a little bit of Pioneer Woman thrown in for good measure), and while I have done some minor tweaking (for example I replaced some of the regular flour with whole wheat and have tried a few different toppings), I haven't messed about with it much yet, but one day I think I will try to knead various things into the dough and see how it turns out. These bagels aren't difficult to make, but the dough does take some muscle when you are kneading it, so don't get discouraged, just keep working at it, and it will come together eventually, I promise. It is worth all the muscle though, these are nothing like the grocery store bagels, which I now call soulless much to the amusement of my mother.


Start by mixing your dry ingredients together. I replaced 2 1/3 cups white bread flour with whole wheat, but you could leave it all white if you wanted. And I have used all purpose flour in the past, when we didn't have bread flour, and it worked just fine.


Then combine the warm water, oil, and sugar.


Mix the wet stuff with the dry stuff. I always end up adding a bit more water, especially when I use whole wheat flour. The dough looks like a shaggy mess at this point, but it will come together when you knead it.


See? It turned into a lovely, elastic, cohesive ball after about 10 minutes of intensive kneading. You could always knead it in a stand mixer, however, in my mixer the bowl has a tendency to get stuck when you knead dough in it for that long, and I figure it is about the same amount of effort to wrestle the bowl off the stand as it is to knead it by hand. After kneading, let the dough rise.


When it has risen properly, divide it into 3 equal pieces (or as equal as you can get them, which in my case is generally not very).


Then divide each third into five equal pieces.


Roll each piece into a ball, then a rope and then pinch the ends together to make a ring. Make sure to really pinch the ends, the first time I made these I ended up with horseshoe shaped bagels because the ends came unpinched. I lay the ends on top of one another and sort of fold them in half and seal it up as well as I can, which seems to work for me. Let them rest/rise for about 20 minutes.


Next is the poaching step, you just drop the bagels into boiling water, a few at a time.


I actually have no idea what purpose the poaching serves, as far as I can tell, it makes the bagels look funny and lumpy, although I am sure there is more going on than that. Anyways, at this point, after the poaching, I sometimes add toppings, like sesame seeds or poppy seeds or grated cheese, but this time I just wanted plain bagels.


Bake until nice and golden and gorgeous.


Bagels, from How to be a Domestic Goddess by Nigella Lawson

4 1/3 cup white bread flour, plus more as necessary for kneading
2 1/2 whole wheat flour
1 tablespoon salt
1 package rapid-rise yeast
2 tablespoons sugar
1 tablespoon vegetable oil, plus more for greasing
2 1/4 cups warm water, plus more as needed
2 tablespoons malt or sugar, for poaching the bagels
2-3 baking sheets, greased

Combine flour, salt and yeast in a large bowl. Mix the sugar, oil, and water. Make a well in the flour and add the water mixture, mix it all together.

Knead the dough until it is smooth and elastic, you want to add as much flour as you can during the kneading process. Form the dough into a ball and put in an oiled bowl. Cover and let rise for about an hour, it should be well risen and when you poke it with your finger the indent should remain.

Punch the dough down and give it a good knead. Divide it into three pieces. Roll each one into a rope and then cut each rope into five pieces. Roll each piece into a ball then a rope and then pinch the ends together to form a loop.

Let the bagels rise for about 20 minutes. Meanwhile put a large pot of water on to boil. When it boils add the sugar/malt. Preheat the oven to 500. Then when the water is boiling, poach the bagels a few at a time. Boil for about a minute, turning them once.

After poaching put the bagels on the greased baking sheets, add whatever toppings you want, sesame seeds, cheese, whatever you want. Bake for 10-15 minutes, until shiny and golden brown.

Monday, April 19, 2010

Hot Cross Buns Redux: Bread Pudding

As delicious as my hot cross buns were, we couldn't finish them before they went stale. There was just too much competition from all the jelly beans, m&m's, bunny cake, robins eggs, cadbury eggs and whatnot. So I decided to give the hot cross buns a second chance at life and turned them into a bread pudding. We couldn't finish that either, we were recovering from all the sugar and the weather turned quite warm, not exactly 'curling up with a nice bowl of warm bread pudding' weather if you catch my drift. But that is beside the point. The point is this was my first attempt at bread pudding and I think it turned out quite nicely.

Start with some stale hot cross buns, I used about 4, and cube them.


Then take your eggs, I used 3.


Whisk them up with some milk, melted butter and spices. I used cinnamon and nutmeg because that is what was in the buns, you could use anything you want. Also, you could add some more dried fruit or nuts but I felt there was enough of that stuff in the bread.


Pour the egg mixture over the bread and sort of smush it all down together, which may or may not be unnecessary but it is fun. Sprinkle with muscovado sugar.


Bake at 350 for about 45 minutes and eat warm.

Hot Cross Pudding
about 4 stale hot cross buns (roughly 3 cups worth of bread cubes)
3 eggs
1 1/4 cup milk
1/4 teaspoon cinnamon
1/4 teaspoon nutmeg
1 tablespoon melted butter
2 tablespoons sugar
muscovado sugar for sprinkling

Preheat oven to 350.
Cube the bread and place in a greased loaf pan.
Mix the eggs, milk, spices, butter and sugar together. Pour over the bread and sprinkle with the muscovado sugar (I like the crunch of the muscovado sugar, but you could use regular sugar if you want).
Bake at 350 for about 45 minutes and serve warm.


Thursday, April 15, 2010

Hot Cross Buns

I know I am behind the times, and everyone else already posted all their hot cross bun recipes ages ago (ok maybe it wasn't ages, but I have completely lost my grasp of time, this new job of mine where I work in the morning and then have the day off and work again in the evening makes every day feel more like 2 mini days, which I feel is a somewhat valid excuse for not being able to remember when Easter was). Anyways, I am finding that I am quite fond of food that is connected to specific holidays (like hot cross buns and Good Friday), I want to try to incorporate more of it into my daily life, of course that means I am going to need to find some more holidays to celebrate with food on a daily basis. Hot cross buns are all kinds of wonderful according to wikipedia. They save you from shipwrecks and do good things for your friendships and make it so your bread always rises and nothing will burn in your kitchen. Of course I think technically speaking, you need to carry around a bun with you to make sure all these things happen, but if you are like me (I tend to be more liberal with my interpretations, for example I feel that going to a christmas pageant can certainly take the place of going to church christmas day, my mother does not always agree) baking these babies will keep you from encountering any perfect storm type scenarios for at least a year, no need to bring one along. I used this recipe, I don't know how much of a difference using honey instead of sugar made, but I liked the idea.


Making these buns is a bit of a process. Start by mixing the yeast and water.


Then mix the milk, butter, honey and salt together and heat until the butter melts. Depending on how hot this mixture gets during that process, you may want to let it cool a bit before mixing it with the yeast. If it's too hot it will kill the yeast and no one wants dead yeast.


Next, whisk the eggs and spices in a good sized bowl and add the yeast/milk/butter/honey mixture. Toss in your dried cranberries, or raisins or whatever dried fruit you are using. I personally dislike raisins, they make me sad for the grapes they once were, so I always either leave them out or substitute craisins.


Add your flour slowly, then knead until it looks something like this. Cover and let it rise for about an hour or until it has doubled.


After it has risen (like Jesus) (sorry, couldn't help myself, and it was for Good Friday after all) divide the dough into 24 pieces and roll them into balls. Dividing dough evenly is not my strong suit, as you can see. Toss them into a 13x9x2 pan and let them rise again. After they have risen a second time, cut a cross into each bun with a sharp knife, a dull one will be frustrating to use and a bit messy, trust me I know.


Bake for 15 minutes and then glaze with honey and bake for 5 more minutes.


In an ideal world, you would let cool and then put the icing crosses on each bun. In my world, certain people started eating them right away and doing individual crosses was a bit tedious not to mention my icing was a bit runny for that, so I drizzled it over all of them and called it a day.

Thursday, April 8, 2010

Roasted Tomato Pasta Sauce

Spring has sprung here in the suburbs. Everything is turning green, even my car thanks to all the pollen. And, thanks to global warming, or something, it's 90 degrees right now. On the plus side I wont have to roam the house with my bread dough looking for the very warmest place I can find so that it will rise in a reasonable amount of time the way I was all winter. But, it has also kicked off a craving for some luscious tomatoes to make into fresh pasta sauce, and we cant quite get those yet. I must have made Nigella's spaghettini al sugo crudo once a week last summer, and I am sure I will be making it and posting it here soon, but until that day comes, we will just have to make do with this sauce adapted from Martha Stewart (I was going to link you to the original recipe, but I cannot find it on her website for some reason, o Martha what am I going to do with you). Roasting the tomatoes first bumps up the essential tomatoeyness, for lack of a better word, and gives the sauce a great flavor, while the fresh basil and mozzarella brighten it up some. O and I hope you all had lovely Easters and/or Passovers, I know I did.


Start with your tomatoes, ideally you want roughly 2 cups, I had less. We had these heirloom cherry tomatoes in the fridge, so that is what I used. Toss with a splash of olive oil and a sprinkle of salt and pepper. Pop in a 375 degree oven for about 10-15 minutes, tossing once or twice so they cook evenly. You want them to sort of collapse in on themselves, and it doesn't hurt if the skin pops.


Once the tomatoes are roasted, you can carry on making the sauce, or you could do this part ahead of time and just let them hang out in your fridge for a day or two until you are ready.


Now for the sauce. Pour a bit of olive oil into a skillet, enough to cover the bottom. Martha would have you do 1/4 cup, but I didn't do that much. Smash 3 cloves of garlic and saute them in the oil. Don't worry, you don't have to eat those giant cloves (unless you want to), you just want them to infuse some lovely garlic flavor into the sauce.


Once you can smell the garlic, add the tomatoes, I cut these in half, but made sure to get as many of the guts that squirted out into the pan as I could.


I wanted a slightly saucier sauce, so I added a small can of tomato sauce. But, you could also add a can of diced tomatoes if you wanted a chunkier sauce, or you could start out with more roasted tomatoes to begin with. At this point i also added a handful of basil that I cut into strips using my handy dandy kitchen scissors (I love kitchen scissors, when I use them it generally means I don't have to wash a cutting board). Let the sauce simmer until the pasta is ready.


Meanwhile, you should be boiling some pasta. The point of the pasta is twofold, obviously as a vehicle for the lovely pasta sauce, but also for the starchy water. Actual chefs put pasta water in their sauces, and I do too. Actually most of the time I forget, but this time I remembered, well mostly because I had the heat on a bit too high and the sauce was bubbling down more than I wanted so I tossed in a ladleful or two of pasta water.


Once the pasta is done, drain it and return it to the pot. Add the sauce and an entire ball of fresh mozzarella, cut into cubes. Toss it all together, put the lid back on the pot and let it sit for a few minutes so the cheese can melt.


After the cheese is nice and melty, it is ready to eat.

Roasted Tomato Pasta Sauce
about 2 cups cherry tomatoes
olive oil
salt and pepper
3 cloves garlic, smashed
8 oz. can tomato sauce
about 10 leaves of fresh basil
1 ball fresh mozzarella, cubed

Toss the tomatoes in enough olive oil to lightly coat, sprinkle with salt and pepper (if using cherry tomatoes leave them whole, I would cut romas in half and anything bigger than that into quarters). Spread in a single layer on a cookie sheet. Roast in a 375 oven until they collapse in on themselves, about 15 minutes for the cherry tomatoes.

Coat the bottom of a skillet with olive oil and saute the garlic in it over medium heat until fragrant. Roughly chop the roasted tomatoes, then add them to the skillet. Add the tomato sauce, and the chopped basil.

Meanwhile, cook whichever pasta you love the most, adding about a cup of pasta water to the sauce, as needed. Once the pasta is done, drain it and return it to the pot. Toss with sauce and mozzarella, letting it sit until the cheese melts.

Saturday, March 27, 2010

Peach, Raspberry and Blackberry Pie

I am not a huge pie person. I pass on the pumpkin pie at during thanksgiving, and when we get a lemon meringue one for my grandmothers birthday I generally stick with the ice cream portion of the dessert. But sometimes you just really want a slice. In college when that happened, we would all pile into the car and head to Banning's, the 24 hour diner down the road. They had one of those revolving pie cases, and if you were lucky you could get someone to get the chocolate pie and you would get the peanut butter pie and share them both, making the pie version of a reese's cup. Now that Banning's is just under 3,000 miles away, I need a new way to get my pie fix, so I thought I would try my hand at baking one myself, plus I really wanted to make one of those snazzy lattice tops. I made this pie, it uses frozen fruit so you don't have to be constrained by silly things like seasons. I made the crust, but by all means use store bought if you want to, I probably will next time. Also, this is neither here nor there, but I just tried some Trader Joe's Goat Milk Brie and it was quite tasty, and very creamy straight out of the fridge, unlike the regular brie we get. I would recommend it. That is all.


Grab your frozen fruit, you want it to be thawed and as dry as you can get it otherwise your pie will get soggy.


Toss it all together with some sugar, flour, spices and lemon zest.


Then grab your pie crust and plop it in the pan.


Add the fruit, mine looked like it wouldn't all fit, but I piled it up and it worked just fine, although some juice bubbled out when I baked it. Next, you have to make a very difficult decision regarding what top you would like your pie to have. You could do the turtleneck of the pie world and have it completely covered, just make sure to cut vents in it. Or you could do the slightly more risque lattice top, which is actually quite easy to do, if you have ever taken an elementary school art class. Or you could cut out shapes and place them on top.


After you make that tricky decision, brush all exposed pie dough with an egg wash and sprinkle with sugar. Place pie on a cookie sheet to catch any drips and bake.

Tuesday, March 23, 2010

Coffee Cheesecake Brownies

I had this fabulous idea to make mocha brownies, and because bigger is better, I decided that I should not only make brownies, but I should make cheesecake topped brownies, with coffee flavored cheesecake. Brilliant I know. In fact so brilliant that a bunch of other people apparently had the same idea. It wasn't quite as disappointing as when I found out that Caribou Coffee is a ginormous chain (so I may not be the brightest crayon in the box, but seriously, I had only ever seen one in my entire life, until I switched planes in the Minneapolis airport and passed like 4 on my way to my gate) but still, it turns out that I am not a culinary genius/super innovator just yet. That wont keep me from trying though, I have big plans for a whole assortment of cheesecake brownies, raspberry ones, carmel ones, lime ones (Nigella has a great chocolate lime cheesecake that I plan on using for those), peanut butter ones..... Anyways, I must confess something, I love brownies from boxes. Generally I would rather use a box than make them from scratch. My very favorite brownie mix was the generic Safeway one. Tragically, they do not make it any longer and I have yet to find my a new favorite, I am taking suggestions if anyone knows of a spectacular mix.


Start by making your favorite brownies, be it from a box or scratch, I added some of the super strong coffee I made for the cheesecake to the brownie batter, about 1/8 cup worth to bump up the mocha factor.


Next make your cheesecake. I adapted this recipe.


Now, put the brownie batter in the pan, but not all of it, don't really scrape out the bowl just yet, we want to have some batter left to dollop on top of the cheesecake so it looks pretty.


Pour the cheesecake over the batter and spread it out so it covers the entire pan. Then dollop the remaining the brownie batter around on top of the cheesecake. Take a knife and swirl the brownie around to make the pretty patterns.


Bake for about half an hour, you want the brownie bit to be done and the cheesecake bit to be set.

Coffee Cheesecake Brownies
1 batch of brownie batter (enough for a 9x13 pan)
16 oz. cream cheese, softened
1/2 cup sugar
about 1/4 cup very strong coffee
1/2 teaspoon vanilla
2 eggs

Preheat oven to 350, grease a 9x13 pan
Beat the cream cheese and sugar together until well blended. Add the coffee and vanilla, mix well. You want to be able to taste the coffee in this mix, I started with a small bit and kept adding until it tasted coffee-ey enough to me. I had some coffee left so I tossed it in the brownie batter. Mix in the eggs one at a time. Spread almost all of the brownie batter in the pan. Top with the cheesecake mixture, spreading it evenly. Dollop the remaining brownie batter on the cheesecake, drag a knife through the dollops to swirl around. Bake for about 30 min, until the brownie is done and the cheesecake set.