Showing posts with label bread. Show all posts

Monday, May 21, 2012

Dutch Crunch Bread

This weekend I stumbled upon a picture of a sandwich on a delicious dutch crunch roll, which naturally I decided looked pretty darn fabulous and that I needed one of my own asap.  And naturally, the only place I have ever seen dutch crunch rolls is California (for those of you who don't have family in California to introduce to you to the wonders of dutch crunch, it is a crunchy, crackly topping on white bread and it is delicious).  And no, I don't live in California, in case you didn't know, I live 3,000 miles away from California, but that was not going to stop me, o no.  I researched and found a crazy informative blog about the crackle topping here, which it turns out is actually made from rice flour/sugar/yeast/water paste slathered on regular white bread before baking.  Easy right?  That blog mentioned the recipe being from Rose Levy Beranbaum's book The Bread Bible so I promptly went to the library and picked it up, and didn't find anything about dutch crunch in there, which I now realize is because she calls it tiger bread.  Anyways, I used her soft white bread recipe, which is a bit more involved than some bread recipes, but has great flavor, you could use whatever recipe you want and top it with the very first rice flour paste recipe from this blog, which you should probably cut in half because it makes a massive amount (and as I discovered baking the leftover paste on a cookie sheet does NOT make a delicious crunchy snack but rather makes a strangely textured blob).

Start out with your favorite bread dough, whatever you like to use for sammies, I have only seen it with white bread but you could use wheat if that is what floats your boat.  This is the Basic Soft White Sandwich Loaf and I would give you the recipe except it is a full 5 pages in The Bread Bible.  So I won't.

Timing wise, you want to form your rolls so that they can start in on their final rise while you mix the crunch topping and let that sit for its 15 minutes to meld.

The crunch mix is odd, I ended up adding more rice flour to get it to the stiff royal icing consistency called for, I don't really know how much, I sort of got frustrated and dumped a bunch in and that ended up being the right amount, magic.

This is another strange part, these snowballs are the rolls after I slathered the crunch goop on them with my fingers, make sure to cover the whole roll with a relatively thick coat, if it's too thin it won't crackle properly and it won't crackle much at all if it's too thick.  It is messy.  Just a warning.

Bake them up and enjoy.  If you need any clarification regarding the crunch topping check out this blog ( I know, I know, this is the third time I have linked to it, but really, it is quite useful)

Dutch Crunch Topping (this is the halved version, should make enough for about a dozen rolls/ one standard batch of bread dough, if there is such a thing)
1 Tbs yeast
1/2 cup warm water
1 Tbs sugar
1 Tbs veggie oil
1/4 tsp salt
3/4 cup rice flour

Mix all the ingredients together, adding more water or rice flour as needed to make it the consistency of a stiff royal icing.
Let sit 15 min.
Slather a good coat on your rolls or bread and bake according to the bread instructions.




Thursday, February 3, 2011

Parker House Rolls via Pioneer Woman

Our family holidays tend to revolve around food, which is super original of us, obviously.  This Christmas, we went to the country and had what I suppose you would call lunch, which for me consisted of eating my weight in crab balls and sampling everything else, including deer bologna (which according to my cousin, you aren't a real man unless you have some deer bologna in the fridge).  Then we came home for some crab chowder and these parker house rolls I found on PW's website.  The rolls were amazing, which tends to be the case when there is a stick of butter in the rolls themselves, and then you dip them in melted butter before baking and then for good measure slather a bit more on before eating.  They were so good I made them a week later for our traditional New Year's day turkey dinner (which strongly resembles a Thanksgiving turkey dinner only a smidge smaller).  Here is a link to the recipe on PW's site "Parker House Rolls"

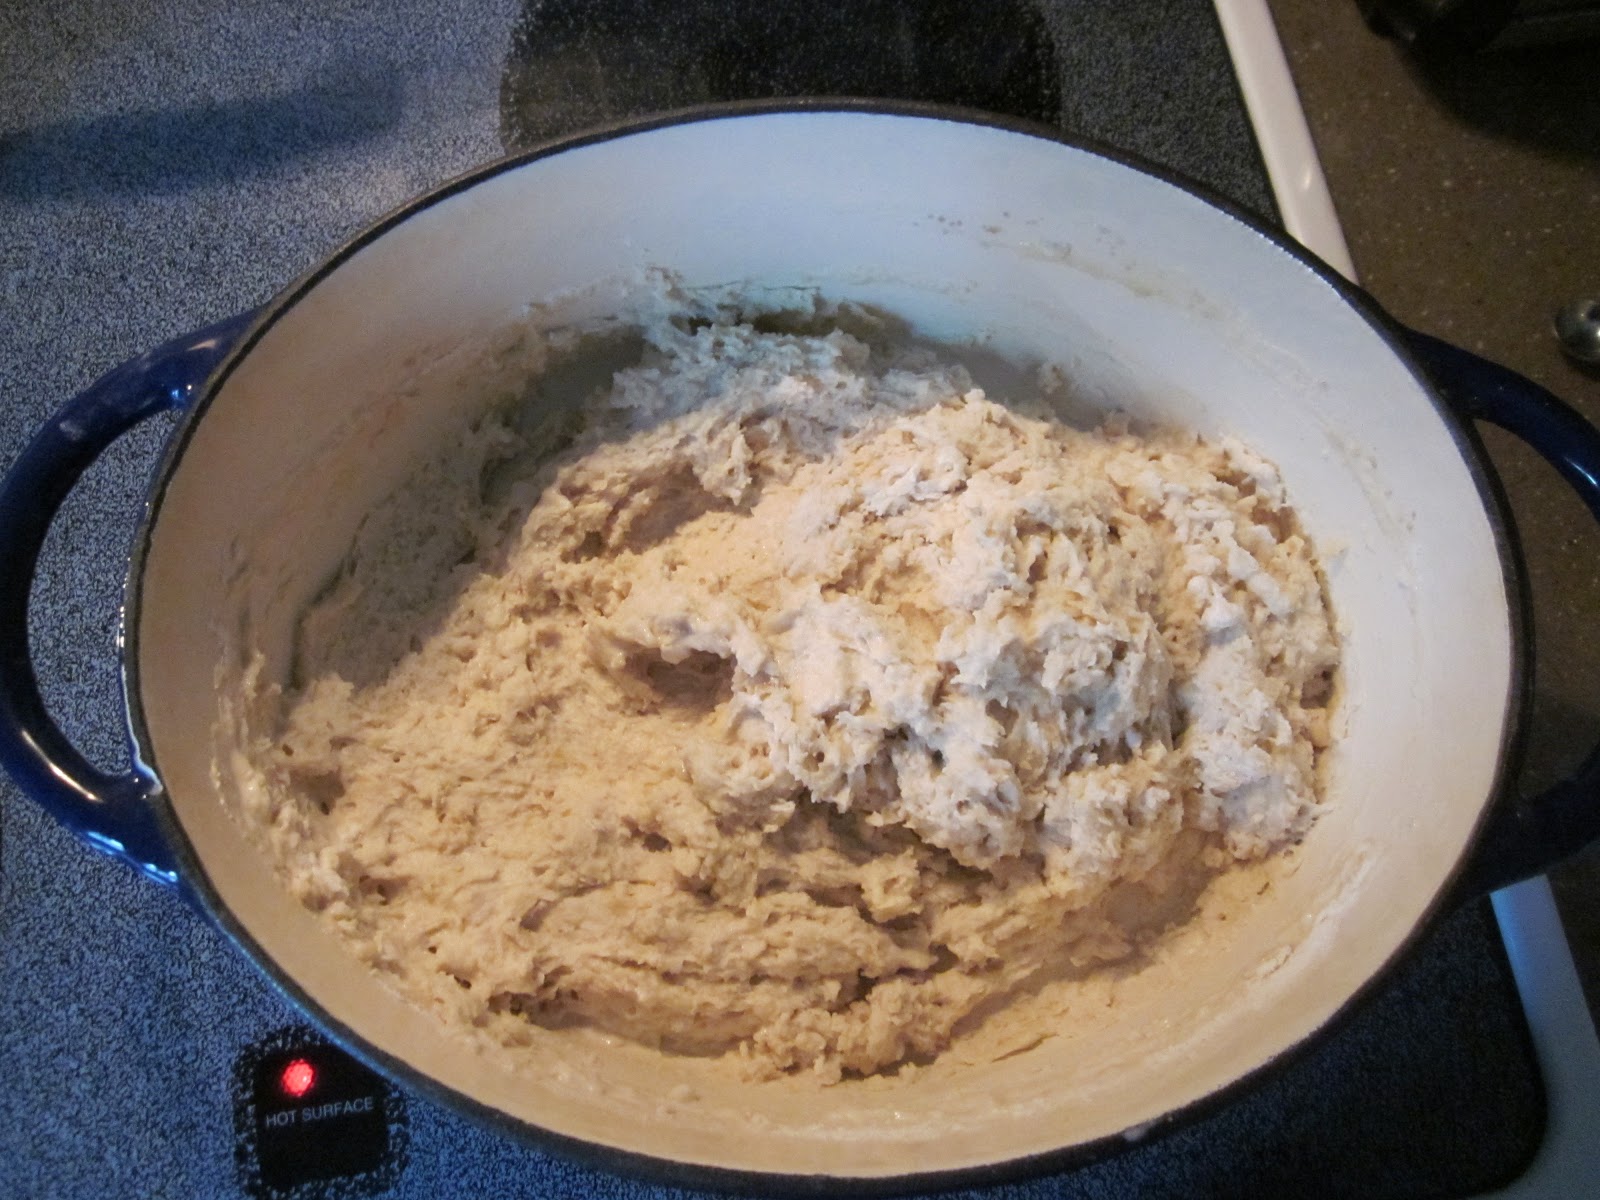
You start out by scalding the milk and melting the butter and dissolving the sugar all together in a large pot, I use a dutch oven.  Then you let it hang out and cool down a bit, while you do something productive, like watch an episode of 30 Rock.

Once the milk has cooled some, stir in the yeast and most of the flour, then cover and let it rise for an hour (which is where the dutch oven complete with lid comes in handy, no fiddling around with saran wrap which never does what I want it to).  Next stir in the rest of the dry ingredients, after which you knead for a couple minutes, and then let it rest/rise for another half an hour.  At this point you could pop it in the fridge instead of letting it rise and then either bake the rolls several hours later (as in make the dough in the morning and then bake them in the evening) or the next day.

After the dough has risen, either on the counter or in the fridge, roll it out to about half an inch thick.  I find it is easier to roll when it is chilled, and the more I work with it, the harder it gets to cut out neat little rounds, in fact at the very end I smooshed the rest of the dough into a blob, tried to flatten it out and then dunked it in the butter, sort of folded it and ended up with a misshapen monster roll that became known as Austin's roll, which if I am not mistaken, he quite enjoyed.  Anyways, back to the point, roll out the dough, cut out circles, dunk them in melted butter and then fold in half and pop them on a cookie sheet.

Let the butter soaked rolls rise once more and then bake until golden.  Just see if you can resist eating one right out of the oven.

Parker House Rolls from The Pioneer Woman
2 cups milk
1 stick butter
1/2 cup sugar
2 1/4 teaspoons active dry yeast
4 cups flour
1/2 teaspoon (heaping) baking powder
1/2 teaspoon (scant) baking soda
1 tablespoon (heaping) salt
1/2 cup additional flour
2/3 stick additional butter

Combine milk, a stick of butter and sugar in a dutch oven, bring to a simmer, but don't boil it, then turn it off and let it cool to lukewarm, about 30 min.

Stir in the yeast and four cups of flour.  Cover and let rise an hour.  Then stir in the additional flour, salt, baking soda and powder.  Turn out onto a floured surface and knead for about 10 min.  Cover with a tea towel and let rise for 30 more minutes, or pop in the fridge and let rise overnight or for several hours at least.

Preheat oven to 400, and melt the rest of the butter.  Roll dough out to about 1/2 inch thick and cut out rounds.  Dunk each round in melted butter, fold and place on a cookie sheet to rise for another 30 min.  Bake for 15 min. 

Tuesday, January 11, 2011

Rosemary Garlic Soda Bread

When some people make soup they plan ahead and have lovely bread on hand to have along with, others, like myself, decide about an hour before dinner that they really really need to have lovely bread along with this soup to make their lives complete but due to a stronger commitment to their novelty slippers (seriously, who doesn't love sock monkey slippers?) than grocery shopping will search the internets for a recipe that they happen to have everything on hand for and can make without any of those time consuming steps, like rising.  Which is where soda bread comes in.  It is delicious, makes me remember just about every St. Patrick's day growing up, brings me back to those 6 months I spent in Ireland and is dead simple to make, as in no rising, no kneading, nothing strenuous.  This one has garlic, rosemary and cheddar cheese which gives it a nice flavor, not at all like traditional garlic bread, but distantly related.  Some claim to not be able to tell there is any cheese in the bread at all, which I suppose may be a valid claim, but there is no butter either and I am sure that you would miss the fat in any case, even if you didn't miss the cheese flavor.  I found the recipe here and followed it pretty exactly, except I used powdered buttermilk and just completely skipped the step where you are supposed to knead the dough into a ball.  The lump of dough I had would have been nearly impossible to knead so instead of spending 10 minutes cursing the dough and whoever created this recipe, I slapped it onto the baking sheet and mushed it into a ball and the world did not end and the bread was pretty good, if I do say so myself.

Start by mixing all the dry ingredients together.  If you use powdered buttermilk add the powder now, then when you add the liquid just add the appropriate amount of water.

Mix in your water, or actual buttermilk.  I used to use actual buttermilk, and I always had big plans for using the entire jug of it before it went bad, but somewhere along the way I never quite managed to follow through on them and there was frequently buttermilk languishing in the back of the fridge.  But then I heard that the powdered stuff works just fine and I haven't looked back since.   

Anyways, once everything is combined, dump it onto a baking sheet and form it into some sort of uniform loaf type shape, the recipe says to score it, which would imply a much dryer dough than what I had, but then again, I didn't knead it all so there you have it.

Bake it until it sounds hollow when tapped on the bottom, which is actually not what the recipe says, but how I judge all my bread even though I cant always tell if it sounds hollow or not, I guess I should have spent more time a la Trixie Belden solving mysteries and rapping on walls looking for secret passages in my youth.

Thursday, May 6, 2010

Bagels

I have a deep and true love of carbs. My mom talks about how having protein for breakfast is so wonderful and filling, but for me, if there is no bread type item involved then it isn't breakfast. Which is where these bagels come in, they are delicious for breakfast, or really any time of day, they also make wonderful sandwiches (especially if you toss them on Georgie and they get nice and toasty and melty). The recipe is one of Nigella's (I love her, if my kitchen had a patron saint it would probably be her with a little bit of Pioneer Woman thrown in for good measure), and while I have done some minor tweaking (for example I replaced some of the regular flour with whole wheat and have tried a few different toppings), I haven't messed about with it much yet, but one day I think I will try to knead various things into the dough and see how it turns out. These bagels aren't difficult to make, but the dough does take some muscle when you are kneading it, so don't get discouraged, just keep working at it, and it will come together eventually, I promise. It is worth all the muscle though, these are nothing like the grocery store bagels, which I now call soulless much to the amusement of my mother.


Start by mixing your dry ingredients together. I replaced 2 1/3 cups white bread flour with whole wheat, but you could leave it all white if you wanted. And I have used all purpose flour in the past, when we didn't have bread flour, and it worked just fine.


Then combine the warm water, oil, and sugar.


Mix the wet stuff with the dry stuff. I always end up adding a bit more water, especially when I use whole wheat flour. The dough looks like a shaggy mess at this point, but it will come together when you knead it.


See? It turned into a lovely, elastic, cohesive ball after about 10 minutes of intensive kneading. You could always knead it in a stand mixer, however, in my mixer the bowl has a tendency to get stuck when you knead dough in it for that long, and I figure it is about the same amount of effort to wrestle the bowl off the stand as it is to knead it by hand. After kneading, let the dough rise.


When it has risen properly, divide it into 3 equal pieces (or as equal as you can get them, which in my case is generally not very).


Then divide each third into five equal pieces.


Roll each piece into a ball, then a rope and then pinch the ends together to make a ring. Make sure to really pinch the ends, the first time I made these I ended up with horseshoe shaped bagels because the ends came unpinched. I lay the ends on top of one another and sort of fold them in half and seal it up as well as I can, which seems to work for me. Let them rest/rise for about 20 minutes.


Next is the poaching step, you just drop the bagels into boiling water, a few at a time.


I actually have no idea what purpose the poaching serves, as far as I can tell, it makes the bagels look funny and lumpy, although I am sure there is more going on than that. Anyways, at this point, after the poaching, I sometimes add toppings, like sesame seeds or poppy seeds or grated cheese, but this time I just wanted plain bagels.


Bake until nice and golden and gorgeous.


Bagels, from How to be a Domestic Goddess by Nigella Lawson

4 1/3 cup white bread flour, plus more as necessary for kneading
2 1/2 whole wheat flour
1 tablespoon salt
1 package rapid-rise yeast
2 tablespoons sugar
1 tablespoon vegetable oil, plus more for greasing
2 1/4 cups warm water, plus more as needed
2 tablespoons malt or sugar, for poaching the bagels
2-3 baking sheets, greased

Combine flour, salt and yeast in a large bowl. Mix the sugar, oil, and water. Make a well in the flour and add the water mixture, mix it all together.

Knead the dough until it is smooth and elastic, you want to add as much flour as you can during the kneading process. Form the dough into a ball and put in an oiled bowl. Cover and let rise for about an hour, it should be well risen and when you poke it with your finger the indent should remain.

Punch the dough down and give it a good knead. Divide it into three pieces. Roll each one into a rope and then cut each rope into five pieces. Roll each piece into a ball then a rope and then pinch the ends together to form a loop.

Let the bagels rise for about 20 minutes. Meanwhile put a large pot of water on to boil. When it boils add the sugar/malt. Preheat the oven to 500. Then when the water is boiling, poach the bagels a few at a time. Boil for about a minute, turning them once.

After poaching put the bagels on the greased baking sheets, add whatever toppings you want, sesame seeds, cheese, whatever you want. Bake for 10-15 minutes, until shiny and golden brown.

Thursday, April 15, 2010

Hot Cross Buns

I know I am behind the times, and everyone else already posted all their hot cross bun recipes ages ago (ok maybe it wasn't ages, but I have completely lost my grasp of time, this new job of mine where I work in the morning and then have the day off and work again in the evening makes every day feel more like 2 mini days, which I feel is a somewhat valid excuse for not being able to remember when Easter was). Anyways, I am finding that I am quite fond of food that is connected to specific holidays (like hot cross buns and Good Friday), I want to try to incorporate more of it into my daily life, of course that means I am going to need to find some more holidays to celebrate with food on a daily basis. Hot cross buns are all kinds of wonderful according to wikipedia. They save you from shipwrecks and do good things for your friendships and make it so your bread always rises and nothing will burn in your kitchen. Of course I think technically speaking, you need to carry around a bun with you to make sure all these things happen, but if you are like me (I tend to be more liberal with my interpretations, for example I feel that going to a christmas pageant can certainly take the place of going to church christmas day, my mother does not always agree) baking these babies will keep you from encountering any perfect storm type scenarios for at least a year, no need to bring one along. I used this recipe, I don't know how much of a difference using honey instead of sugar made, but I liked the idea.


Making these buns is a bit of a process. Start by mixing the yeast and water.


Then mix the milk, butter, honey and salt together and heat until the butter melts. Depending on how hot this mixture gets during that process, you may want to let it cool a bit before mixing it with the yeast. If it's too hot it will kill the yeast and no one wants dead yeast.


Next, whisk the eggs and spices in a good sized bowl and add the yeast/milk/butter/honey mixture. Toss in your dried cranberries, or raisins or whatever dried fruit you are using. I personally dislike raisins, they make me sad for the grapes they once were, so I always either leave them out or substitute craisins.


Add your flour slowly, then knead until it looks something like this. Cover and let it rise for about an hour or until it has doubled.


After it has risen (like Jesus) (sorry, couldn't help myself, and it was for Good Friday after all) divide the dough into 24 pieces and roll them into balls. Dividing dough evenly is not my strong suit, as you can see. Toss them into a 13x9x2 pan and let them rise again. After they have risen a second time, cut a cross into each bun with a sharp knife, a dull one will be frustrating to use and a bit messy, trust me I know.


Bake for 15 minutes and then glaze with honey and bake for 5 more minutes.


In an ideal world, you would let cool and then put the icing crosses on each bun. In my world, certain people started eating them right away and doing individual crosses was a bit tedious not to mention my icing was a bit runny for that, so I drizzled it over all of them and called it a day.

Sunday, January 17, 2010

Irish Brown Bread

I studied abroad in Ireland. If you know me, I have probably already told you far too much about those six months that I lived in Galway already, if for some reason you have been spared that, I shall make up for it now. Ireland was great, I loved living in Galway, you should probably go and see for yourself. There are some things that I will never understand about the Irish, such as their showers/hot water heaters, or why they take exams at the racecourse, or why 95% of the coffee in the country is utter crap, or why the skittles there taste different, but there are other things that I can fully get behind. For example, curry chips, french fries with curry sauce, amazing. Or the thousands of pubs. Or the big bottles of Bulmers (you can actually get that here, it's called Magners though, it is the same hard cider just with a different name). Or the tart shop. Or the stone walls, I liked the stone walls. Or the cliffs, so amazing. Anyways, if you ever make it to Ireland, I would strongly recommend that you always get the brown bread (for example with the full Irish breakfast that I am sure you will be eating at some point, if they say and would you like toast or brown bread the right answer is always brown bread). I really like the brown bread, and this recipe is as close as you can get using american ingredients.


Mix up your dry ingredients. There are quite a few ingredients, but you really need them all, it makes the bread really delicious.


Add 2 tablespoons of butter, rub it in with your fingers to incorporate it.


Stir in 2 cups of buttermilk and dump it all in a loaf pan. See how easy this is? No kneading or letting it rise and you end up with a yummy yummy loaf of bread. Now toss it in the oven for 40 minutes. While you wait for it to bake you can look at these pictures of Ireland and pretend you are there.


Inishmore, one of the Aran islands. Biking around the island is fun, but you should really question people who tell you that you can go downhill both ways.


Galway, right after sunset, this picture is a bit dark, but I like the sky in it. You can sort of see the Claddagh at the end there, it is technically a fishing village and not really part of Galway City. It is known for the Claddagh ring and the many giant swans that hang out there who are not at all afraid of people anymore.


The cliffs of Moher. They are really famous and were in the movies the Princess Bride, and Harry Potter and the Half Blood Prince.

A part of some castle, I think Blarney castle, home of the blarney stone, which I have in fact, kissed, twice.


Ham and cheese crepe from the weekend market in Galway, delicous.


Shop street in Galway. If you were to turn left at the Bank of Ireland (which you cant really see in this picture, but it is on this street) you would find the tart shop, you should probably pick up a bakewell tart, a lemon tart, a mixed berry tart and a chocolate one if you are ever in the neighborhood.


If you now want an irish husband/wife, you can attend the Lisdoonvarna Matchmaking Festival to find one. Then invite me to the wedding.


Back to the bread though, 40 minutes later it will look like this.


Pop it out of the pan and let it cool a bit before you cut yourself and nice thick slice. It may not be the prettiest bread, but it is quite tasty.

Irish Brown Bread (from Recipe Rascal)
1 3/4 cups all purpose flour
1 3/4 cups whole wheat flour
3 tablespoons toasted wheat bran (I couldn't find wheat bran, so I just used ground flax seeds)
3 tablespoons toasted wheat germ (I don't toast it...)
2 tablespoons old fashioned oats
2 tablespoons packed brown sugar
1 teaspoon baking soda
1/2 teaspoon salt
2 tablespoons butter, cut into bits
2 cups buttermilk

Preheat oven to 425. Butter a 9x5x3 inch loaf pan. Mix everything but the butter and buttermilk. Add butter, rub it in with your fingertips until there are no more big chunks. Stir in buttermilk to form a soft dough. Transfer to loaf pan. Bake for 40 minutes or until a tester comes out clean. Turn bread out of pan and let cook on a rack.

Sunday, January 10, 2010

Cheesy Bread

I did not take any pictures of this recipe, nor did I measure anything, but it was so good that I wanted to share it with you anyways. This is sort of adapted from the Pioneer Woman's cheesy olive bread, but is less decadent, more of an everyday cheesy bread if you will. You can use this method and twist it however you wish to make bread with things you have on hand or to go with your meal. We happened to have a hunk of smoked gouda in the fridge, so I (ok, my father actually did all the work, I just supervised) grated about a cup and a half of the cheese. Then we mixed the grated cheese with a dollop of mayo and a dollop of sour cream. And because we were having it with chili, we added a few sprinkles of paprika and chili powder and a good grinding of fresh black pepper. For an italian meal I would add some basil and oregano. I was also thinking that it would be super tasty to chop up some artichoke hearts and mix them in. Anyways, after you have the cheesy goodness mixed up, spread it on store bought french bread. Use your judgement as to how much bread you need. We cut a good sized loaf in half and then split the half down the middle and spread the cheese on each side, ending up with 2/4th of the loaf cheesy and the rest plain. You want a good layer of cheese on the bread, but not necessarily giant mounds of cheese. The giant mounds of cheese are for when you make this. But back to the everyday cheesy bread, bake it in a 350 degree oven until the cheese bubbles and starts to brown. It really is delicious.

Wednesday, January 6, 2010

Garlic Herb Bread

I bake bread, it is one of those things that I used to think was rather difficult but now that I realize it isn't I have been getting more and more ambitious. Ok, so this bread is not actually that difficult, the braiding makes it look so much more impressive. I found this recipe here, during one of my all too frequent visits to foodgawker (if you have never seen the site, you should check it out, I once described it as 'food porn' to a friend and gave her the entirely wrong idea about what I was doing with my free time).


Start by mixing some of the flour with the garlic, salt, sugar, rosemary, basil and yeast (I didn't put in the dill, I didn't think we had any).


Heat up the milk, water and butter.


When the milk is warm enough, add it the flour mixture. At this point, it smells EXACTLY like those boxes of instant mashed potatoes, the seasoned kind, this may tempt you to taste the dough, it will be disappointing because it won't taste like mashed potatoes. Add the egg and the rest of the flour and knead a little.


After letting the dough rest, split it into thirds and roll each third into a rope. Try to keep them all the same length.


Braid the ropes, pinching the ends to seal. If you never learned the crucial life skill of braiding, please watch this video, make sure your sound is on as the soundtrack is pretty stellar.


After it rises for a bit bake the bread until it is nice and golden. At this point, you could brush it with a tablespoon of melted butter (I did, but I think it is a bit unnecessary, it is not enough to make a difference, so why bother?)


Eat when fresh, it is delicious.